

Photo by Maarten van den Heuvel on Unsplash
Integrating GitLab with Bytebase for Version Control in Database Schema, similar to Source Code
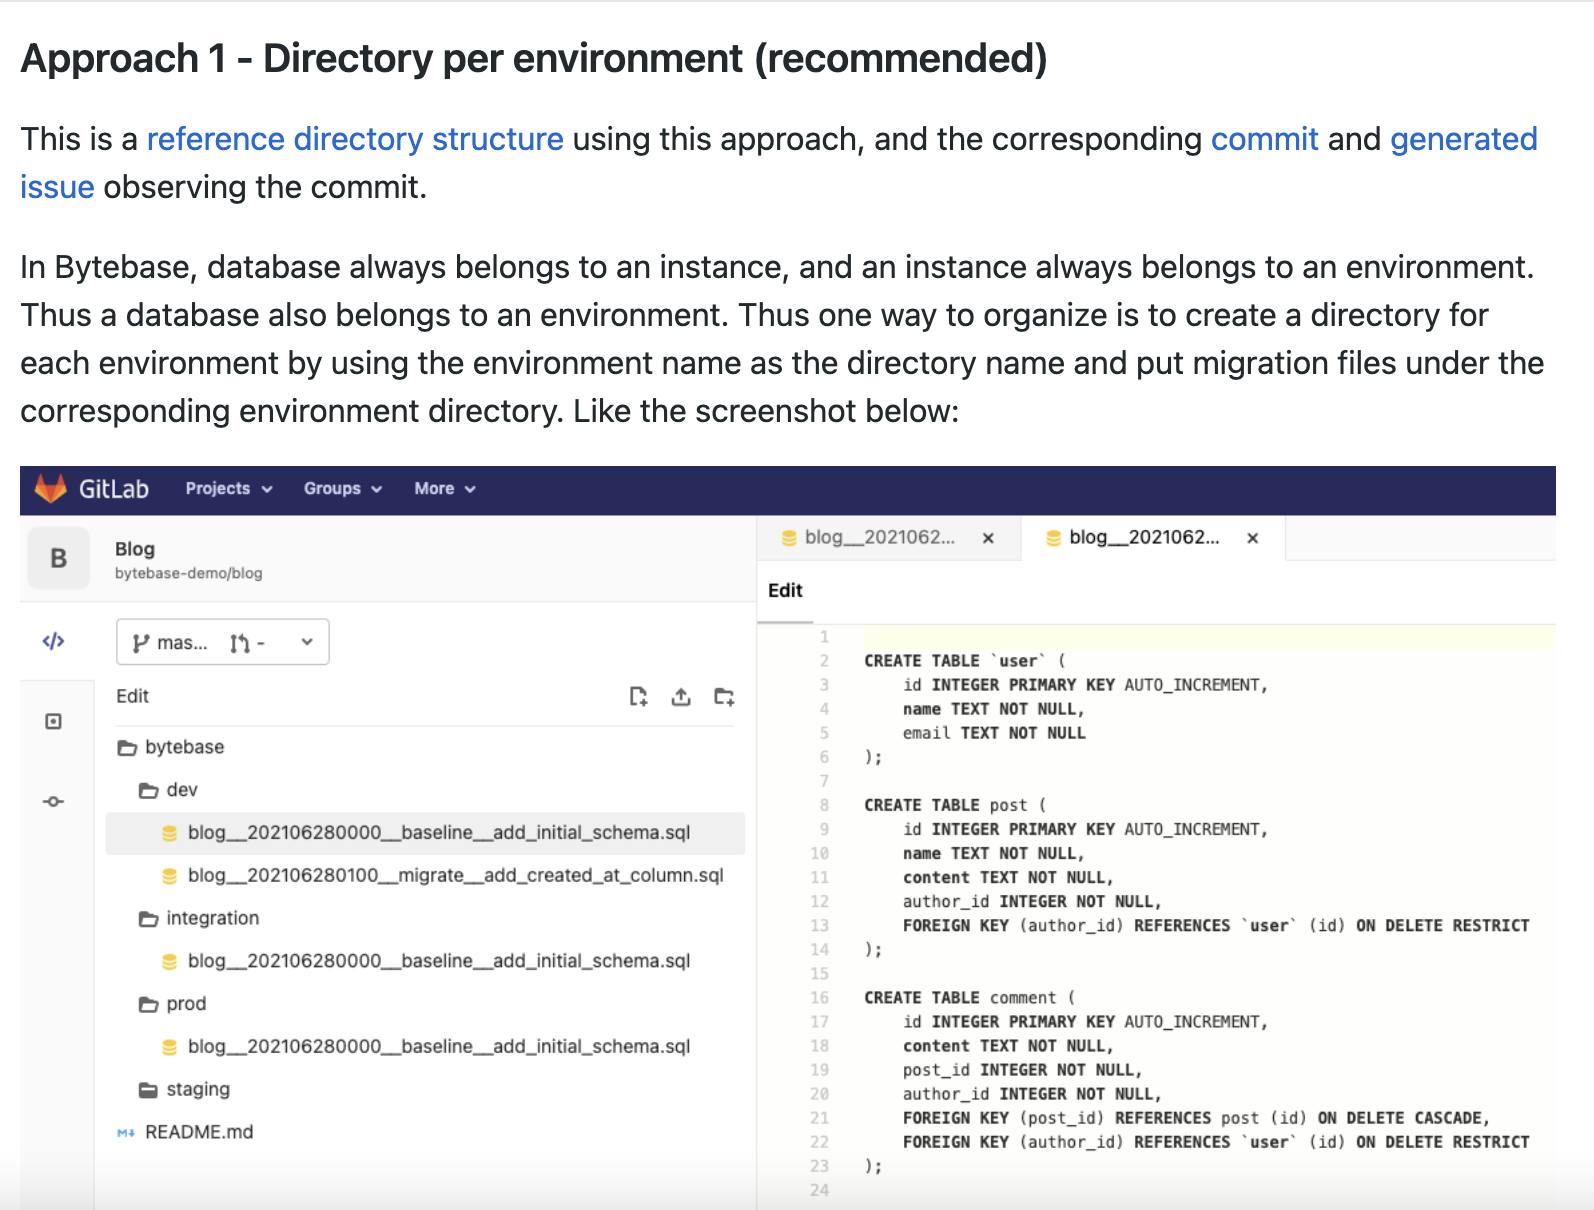
Intro to Bytebase's Version Control workflow


We have gone through Bytebase's UI workflow in the previous article: Using Bytebase to facilitate Database Collaboration Between Developer and DBA
Based on the concept of Database-as-Code, Bytebase provides you with another advanced Version Control workflow (GitOps).
This article will guide you through the version control workflow between GitLab and Bytebase. Ensure you have a working GitLab installed with an admin role and a working Bytebase with an owner role.
We'll still use our sample database Employee in Import sample database into AWS RDS MySQL using Shell & Workbench
GitLab
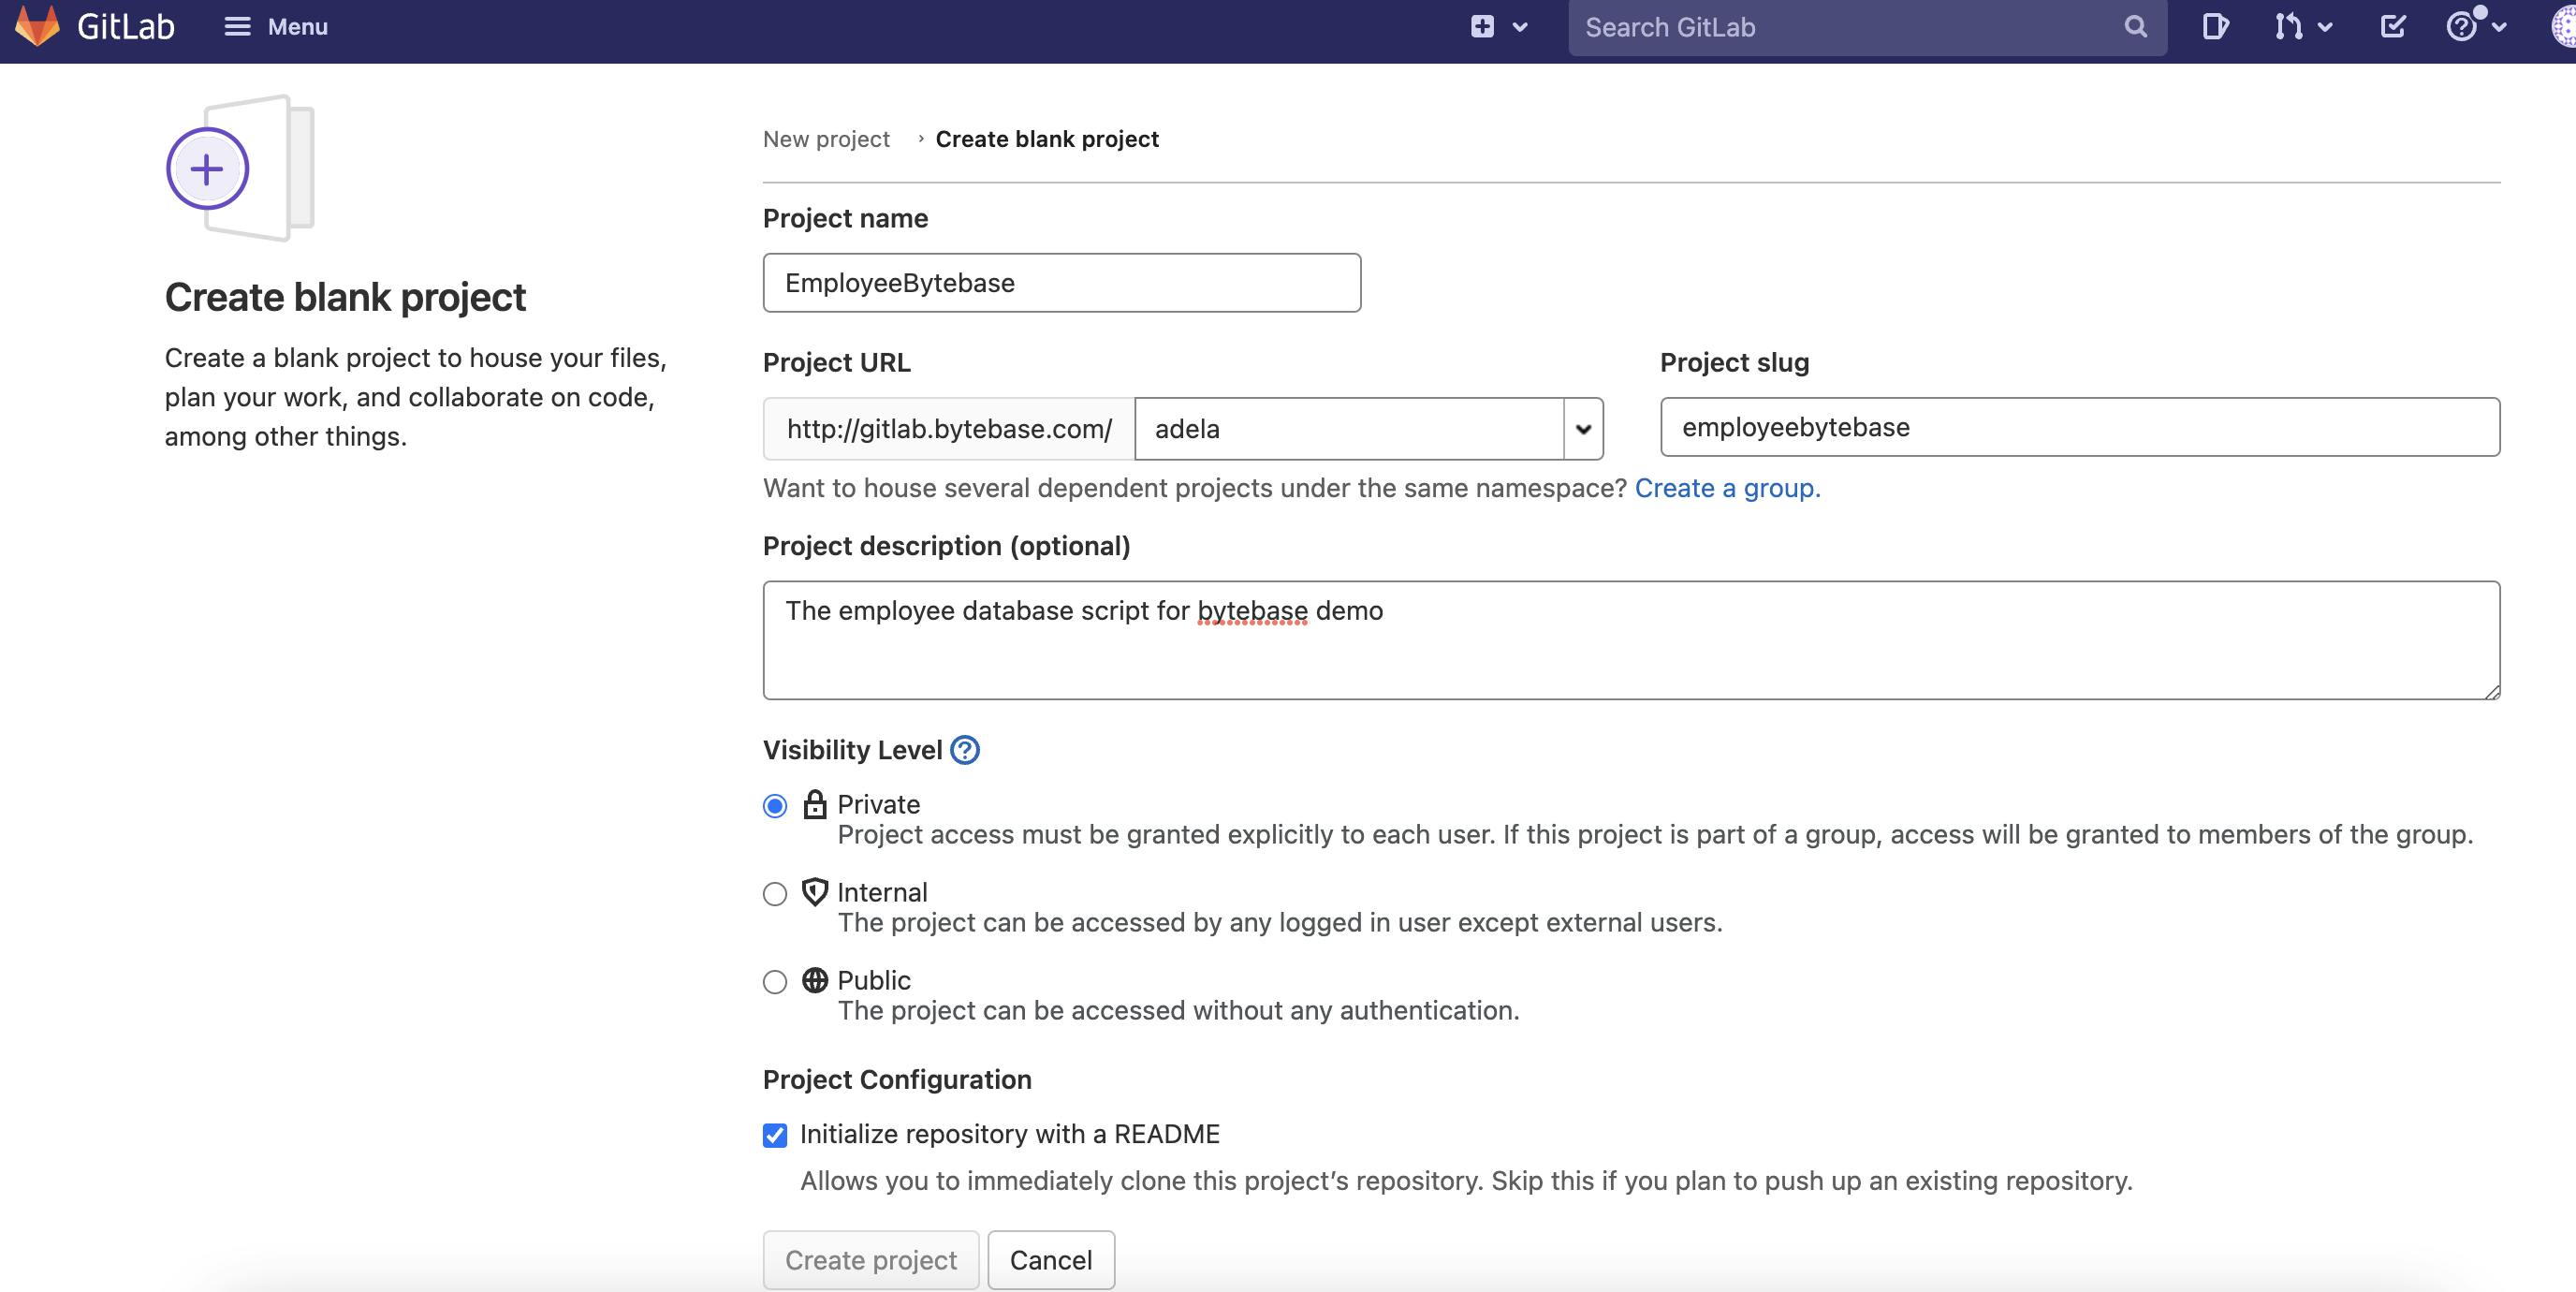
- Create a project called EmployeeBytebase in GitLab.
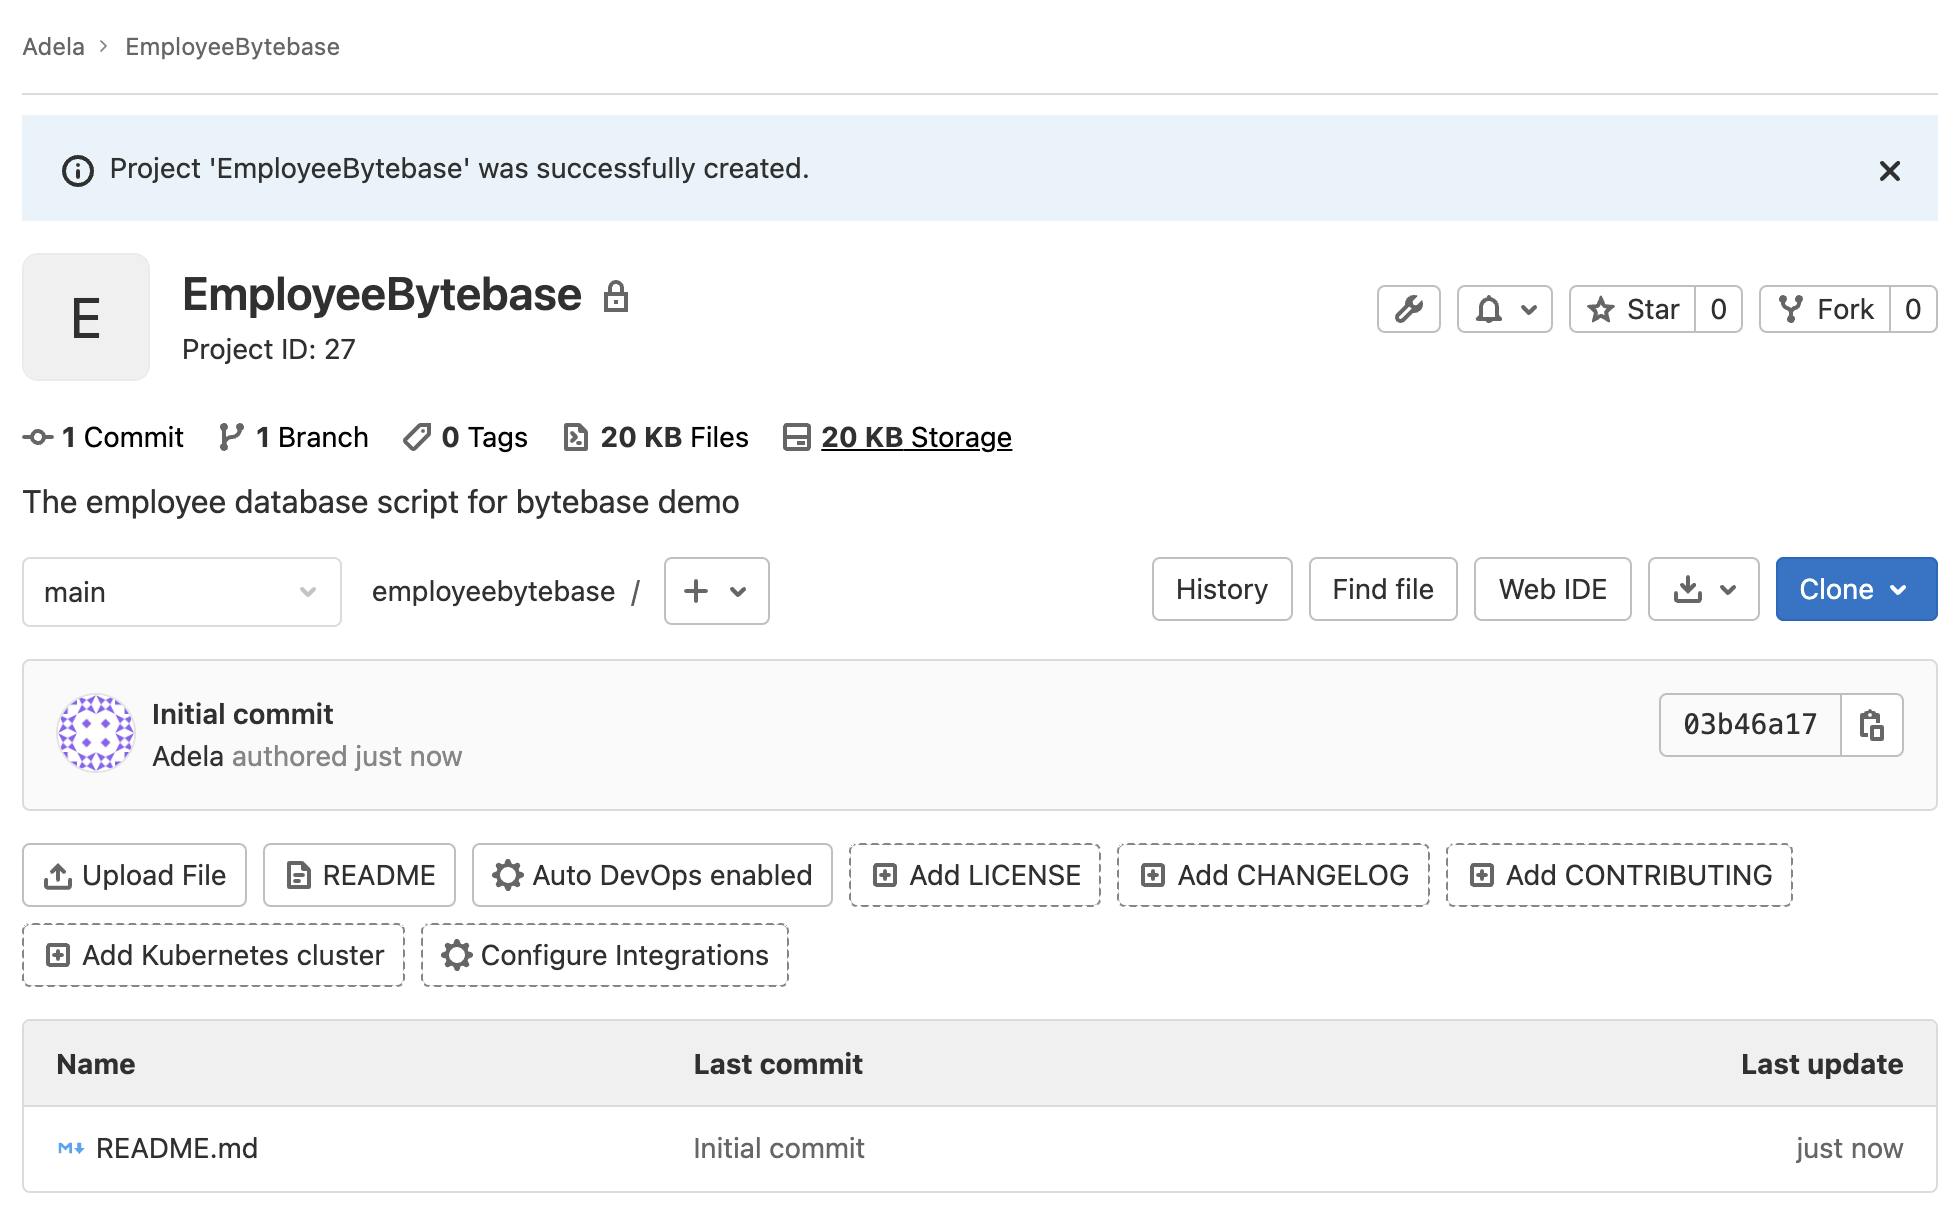
- Clone it to local.

It's now almost empty; we'll add more files along the way.
Bytebase
To start the workflow, we need first do some configuration.
Workspace level
If you haven't used bytebase before, you need to do Enviroment and Instance configuration first, check this article to prepare.
Step 1 Add Git Provider
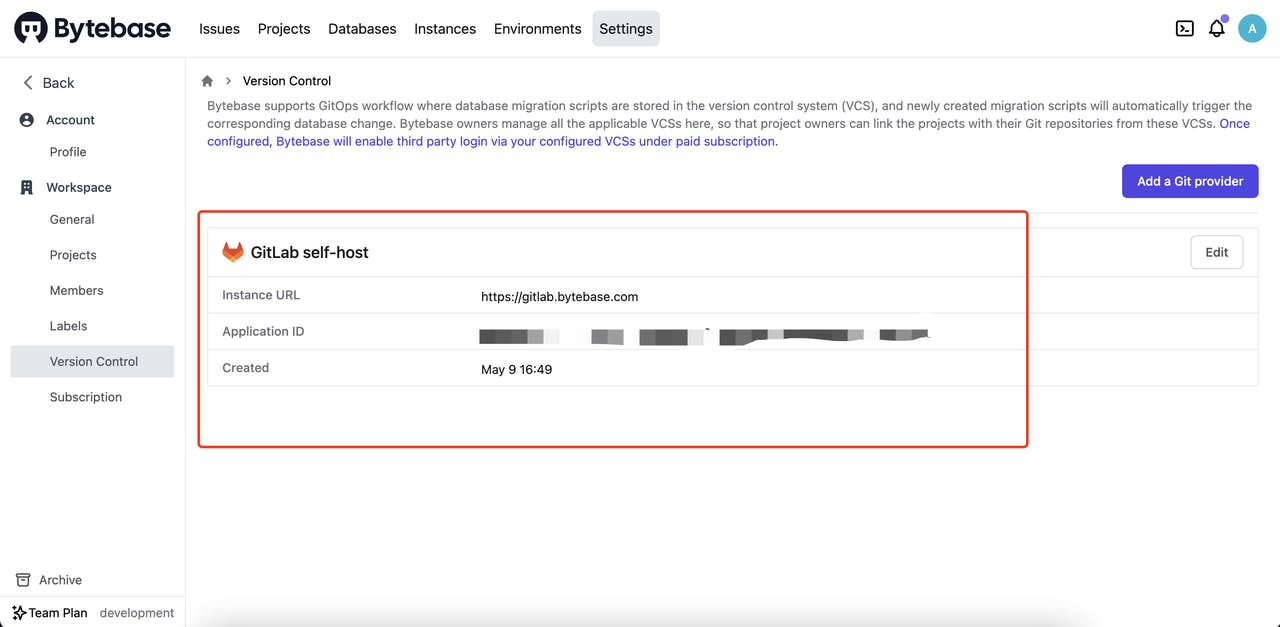
Add a Git provider under Settings->Version Control, you need to have owner role to do this.
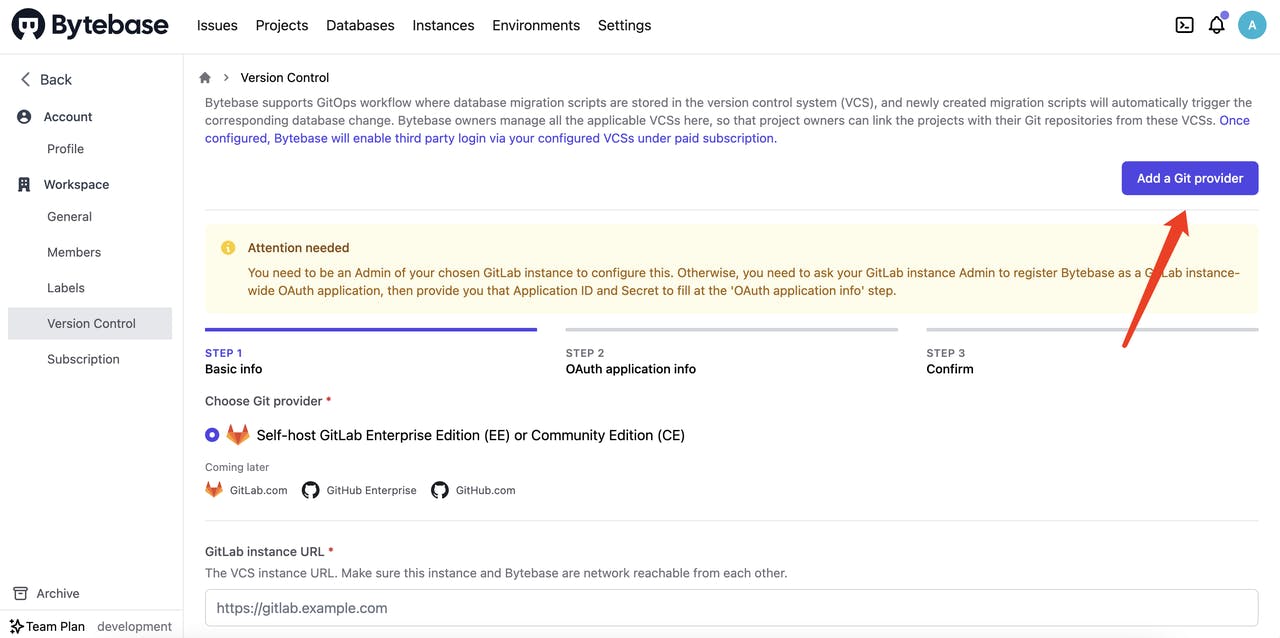
Follow the three steps. You need to have GitLab Admin role to do configuration there and complete the whole process.
Project level
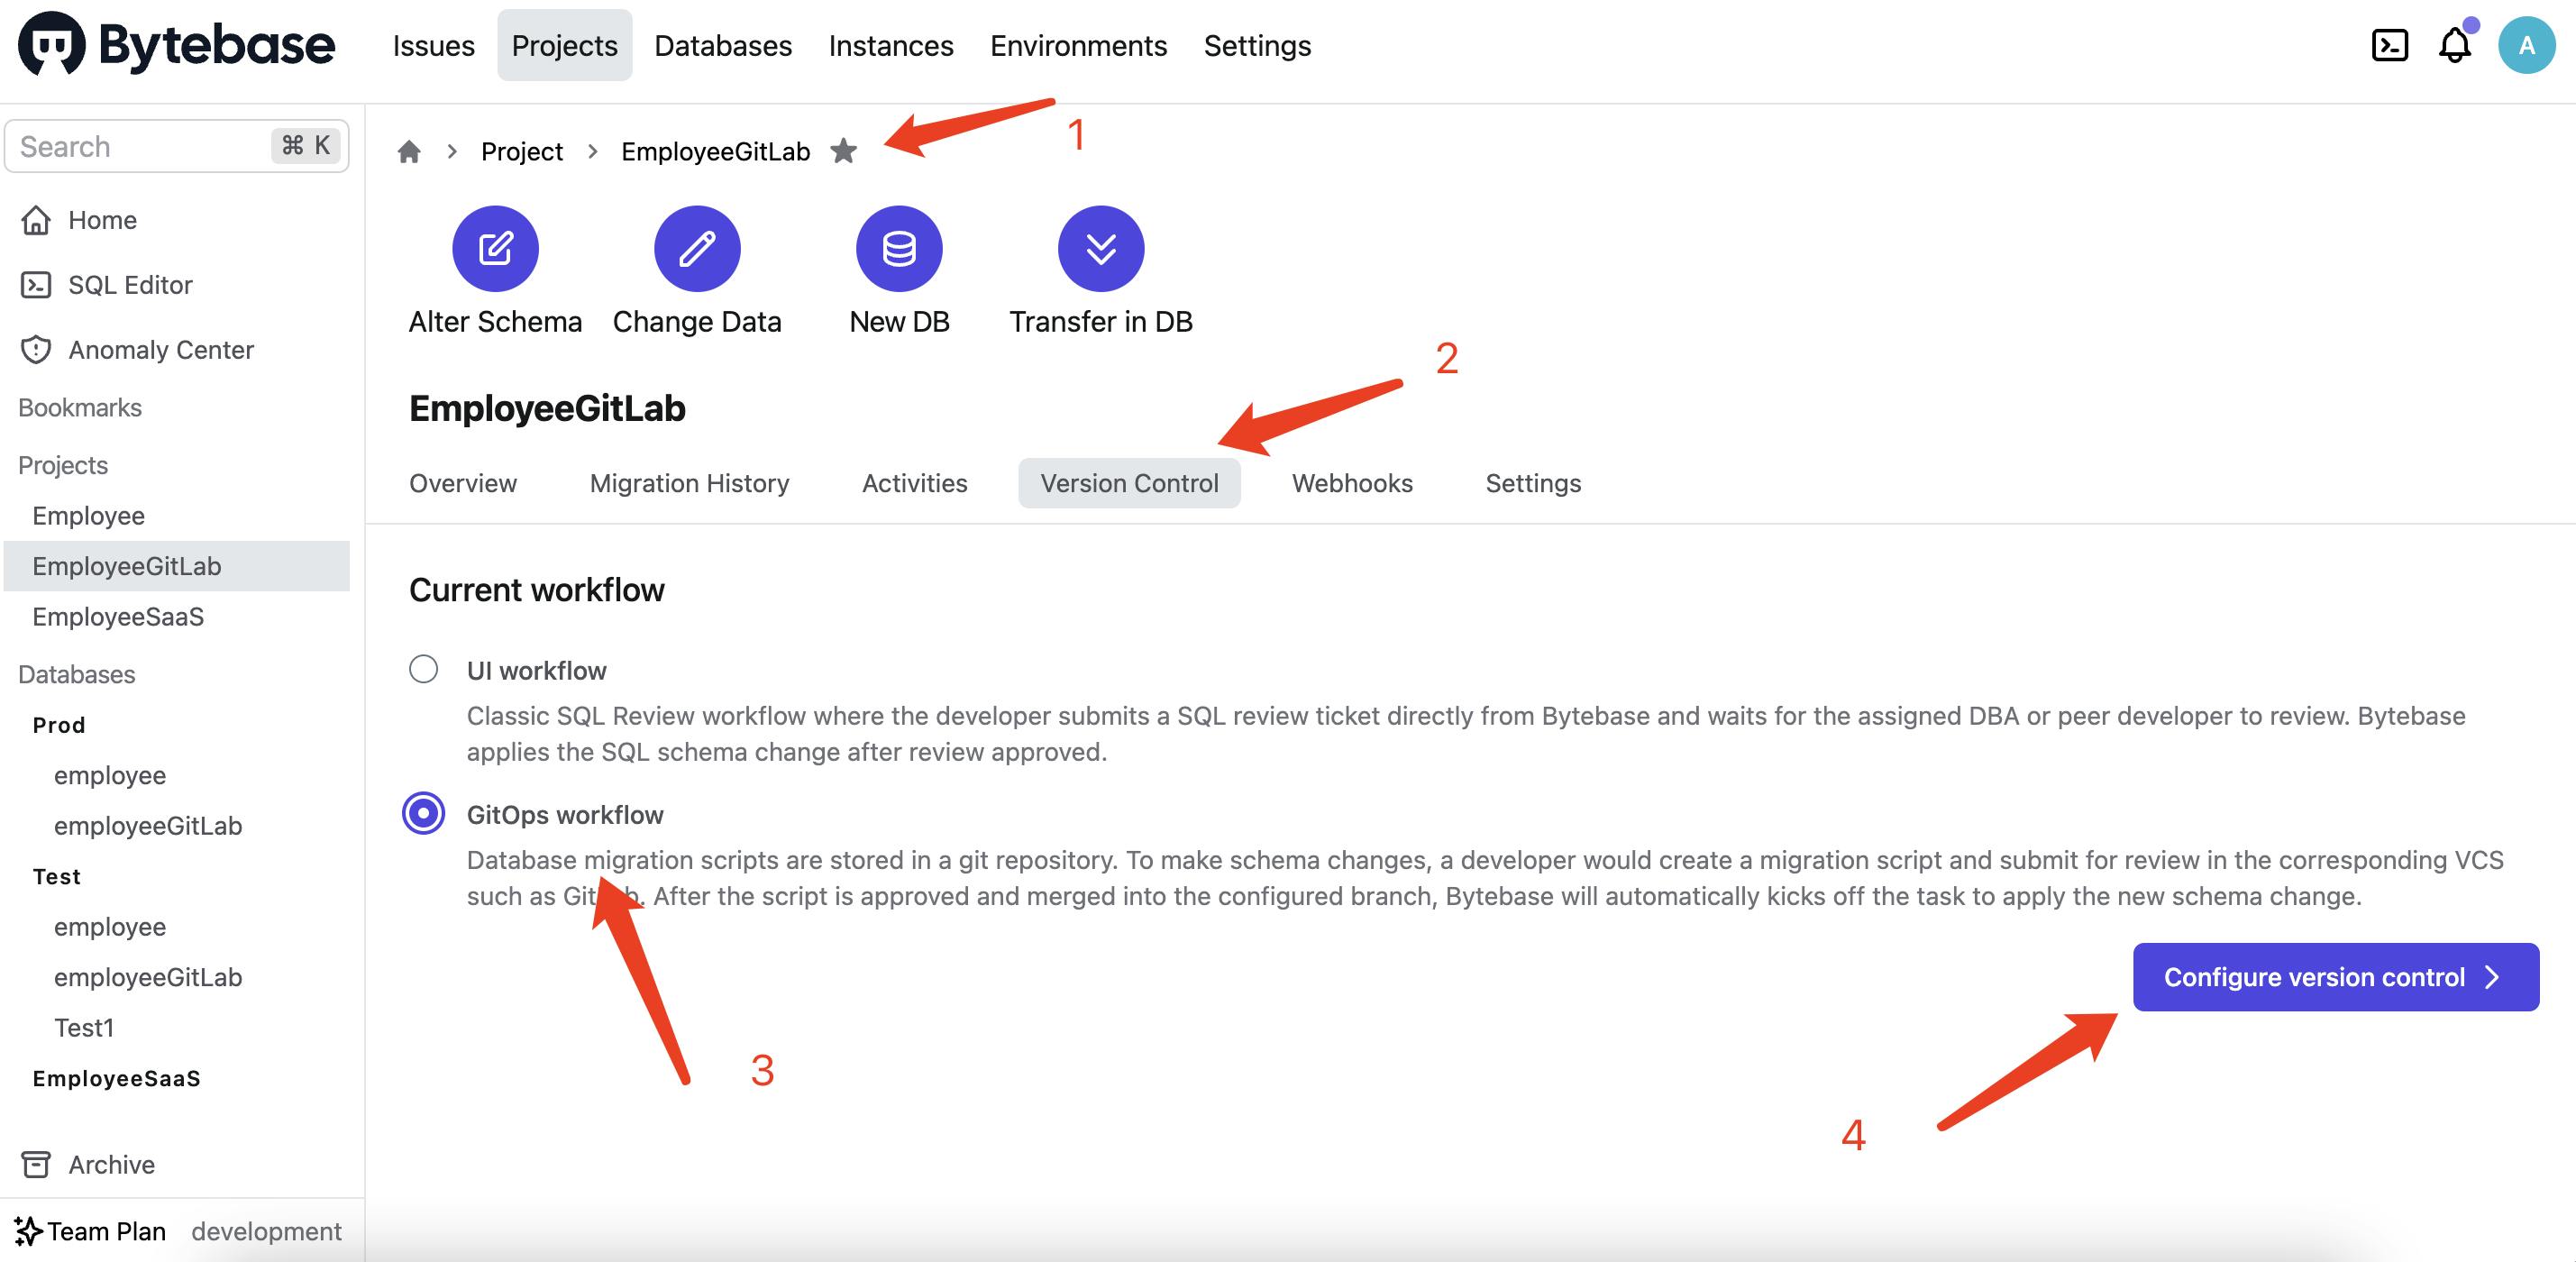
Step 2 Enable Version Control Workflow in Project
Create a project called EmployeeGitLab.
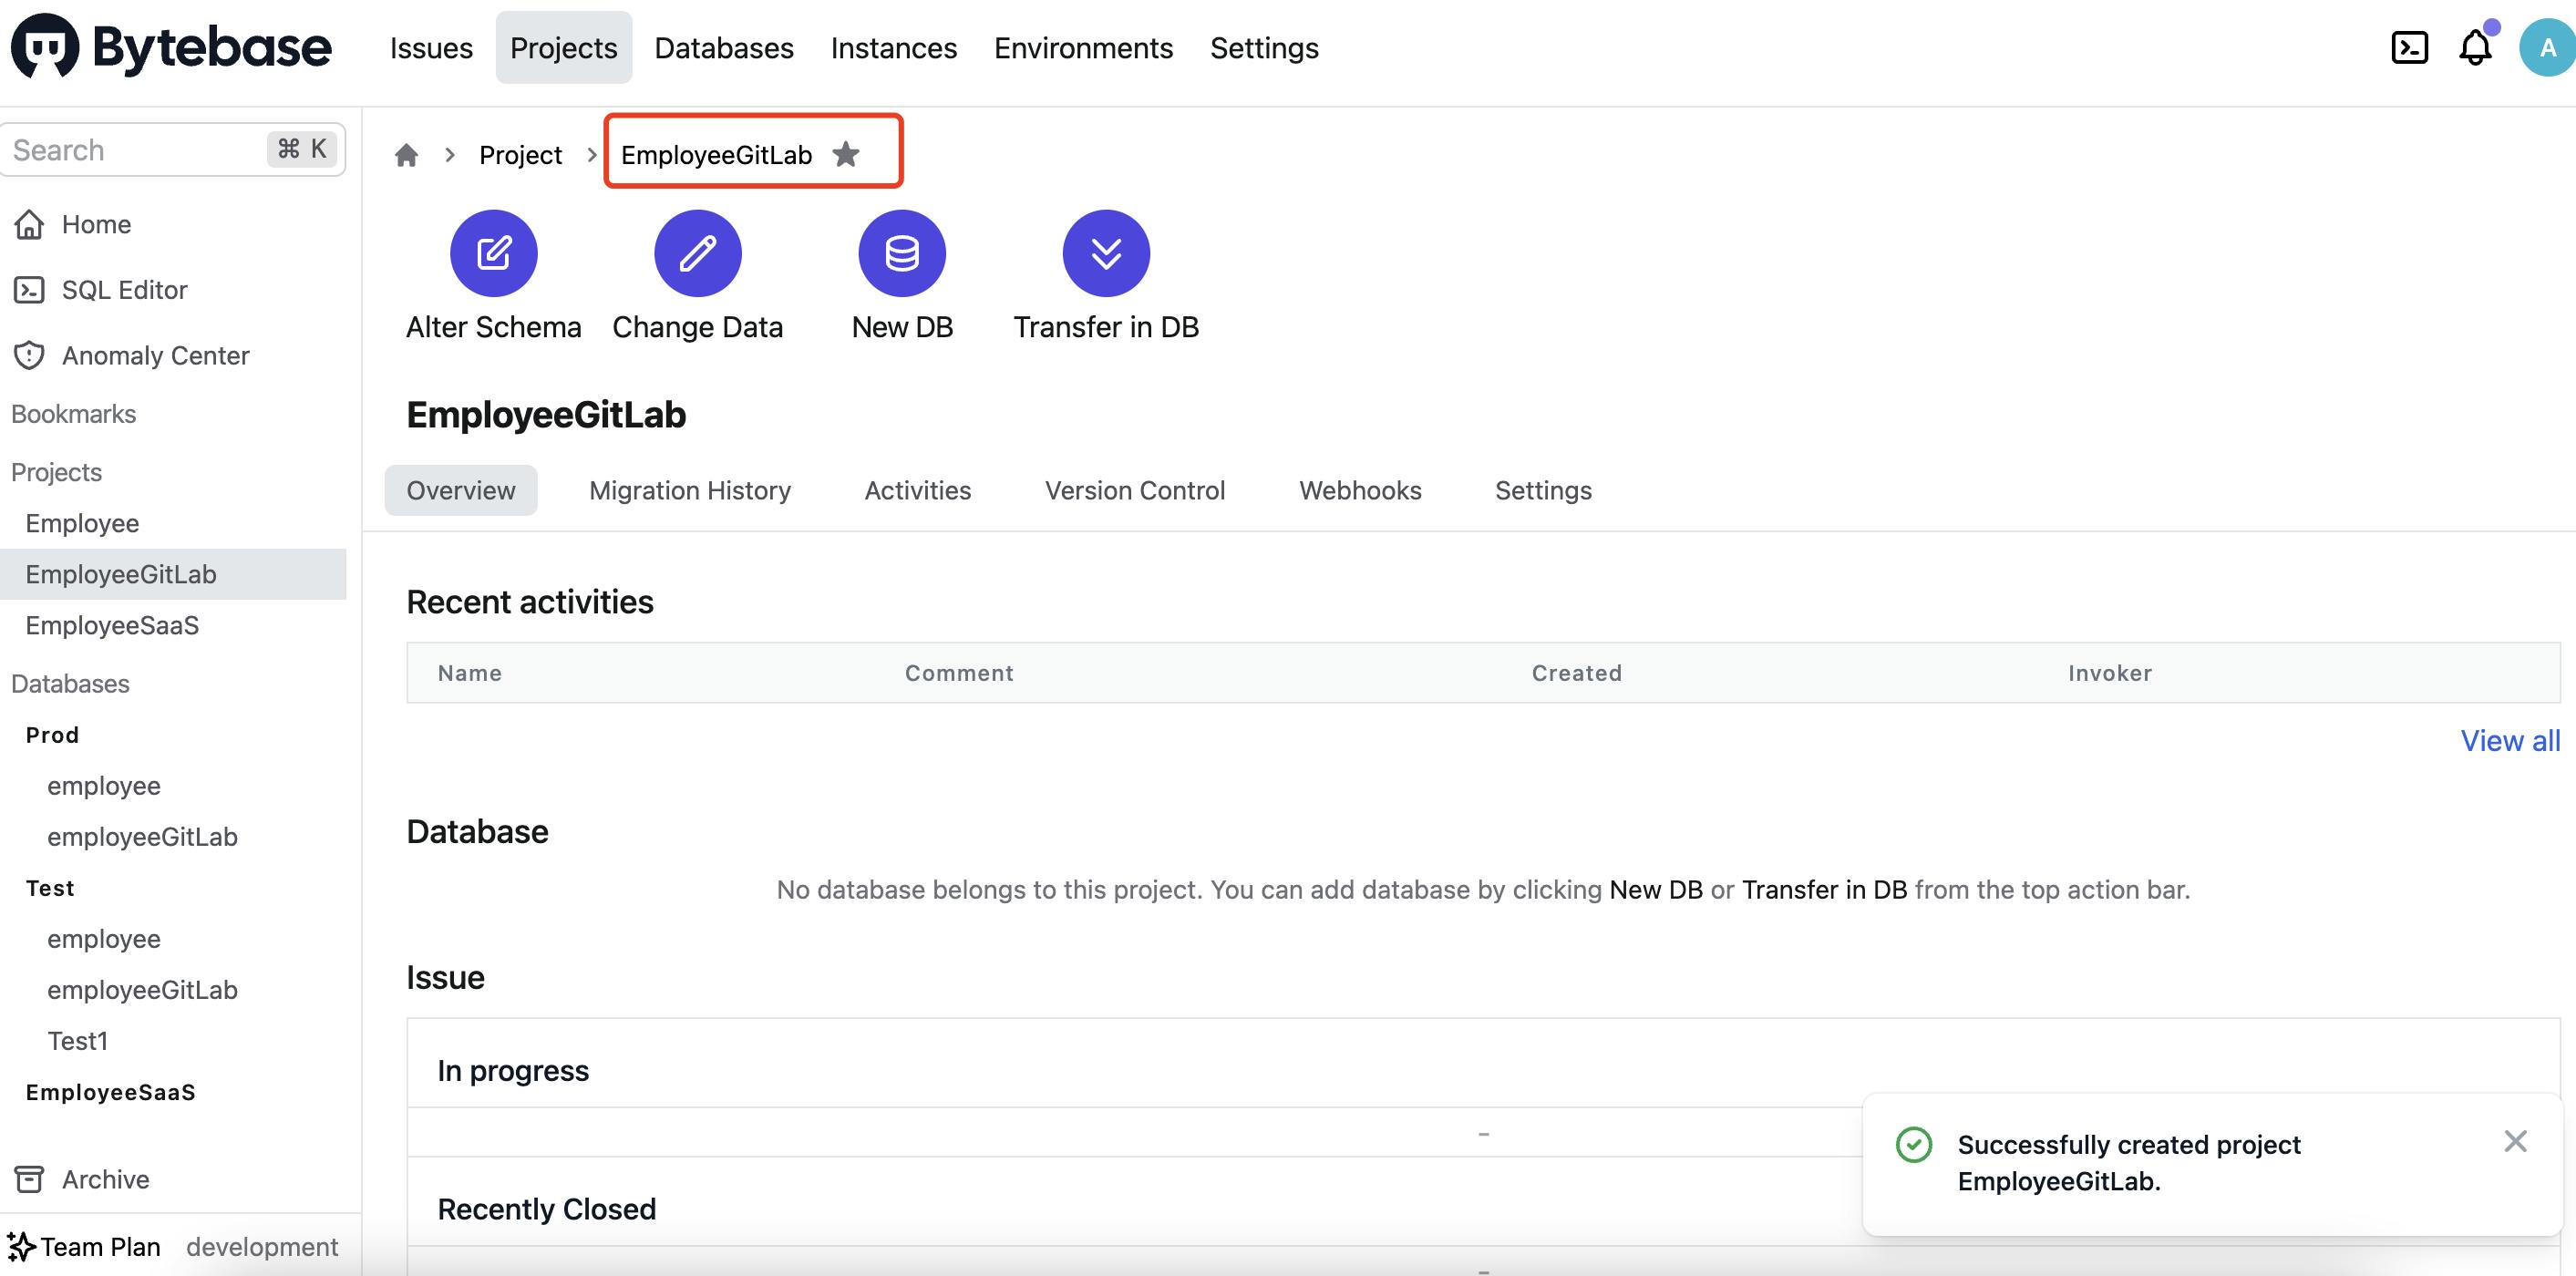
Prepare two databases in our configured instances Test and Prod, it's similar to what we did before, but we can adjust the database name to distinguish.
Transfer in these two databases.

Within this new project, under version control, choose GitOps workflow.
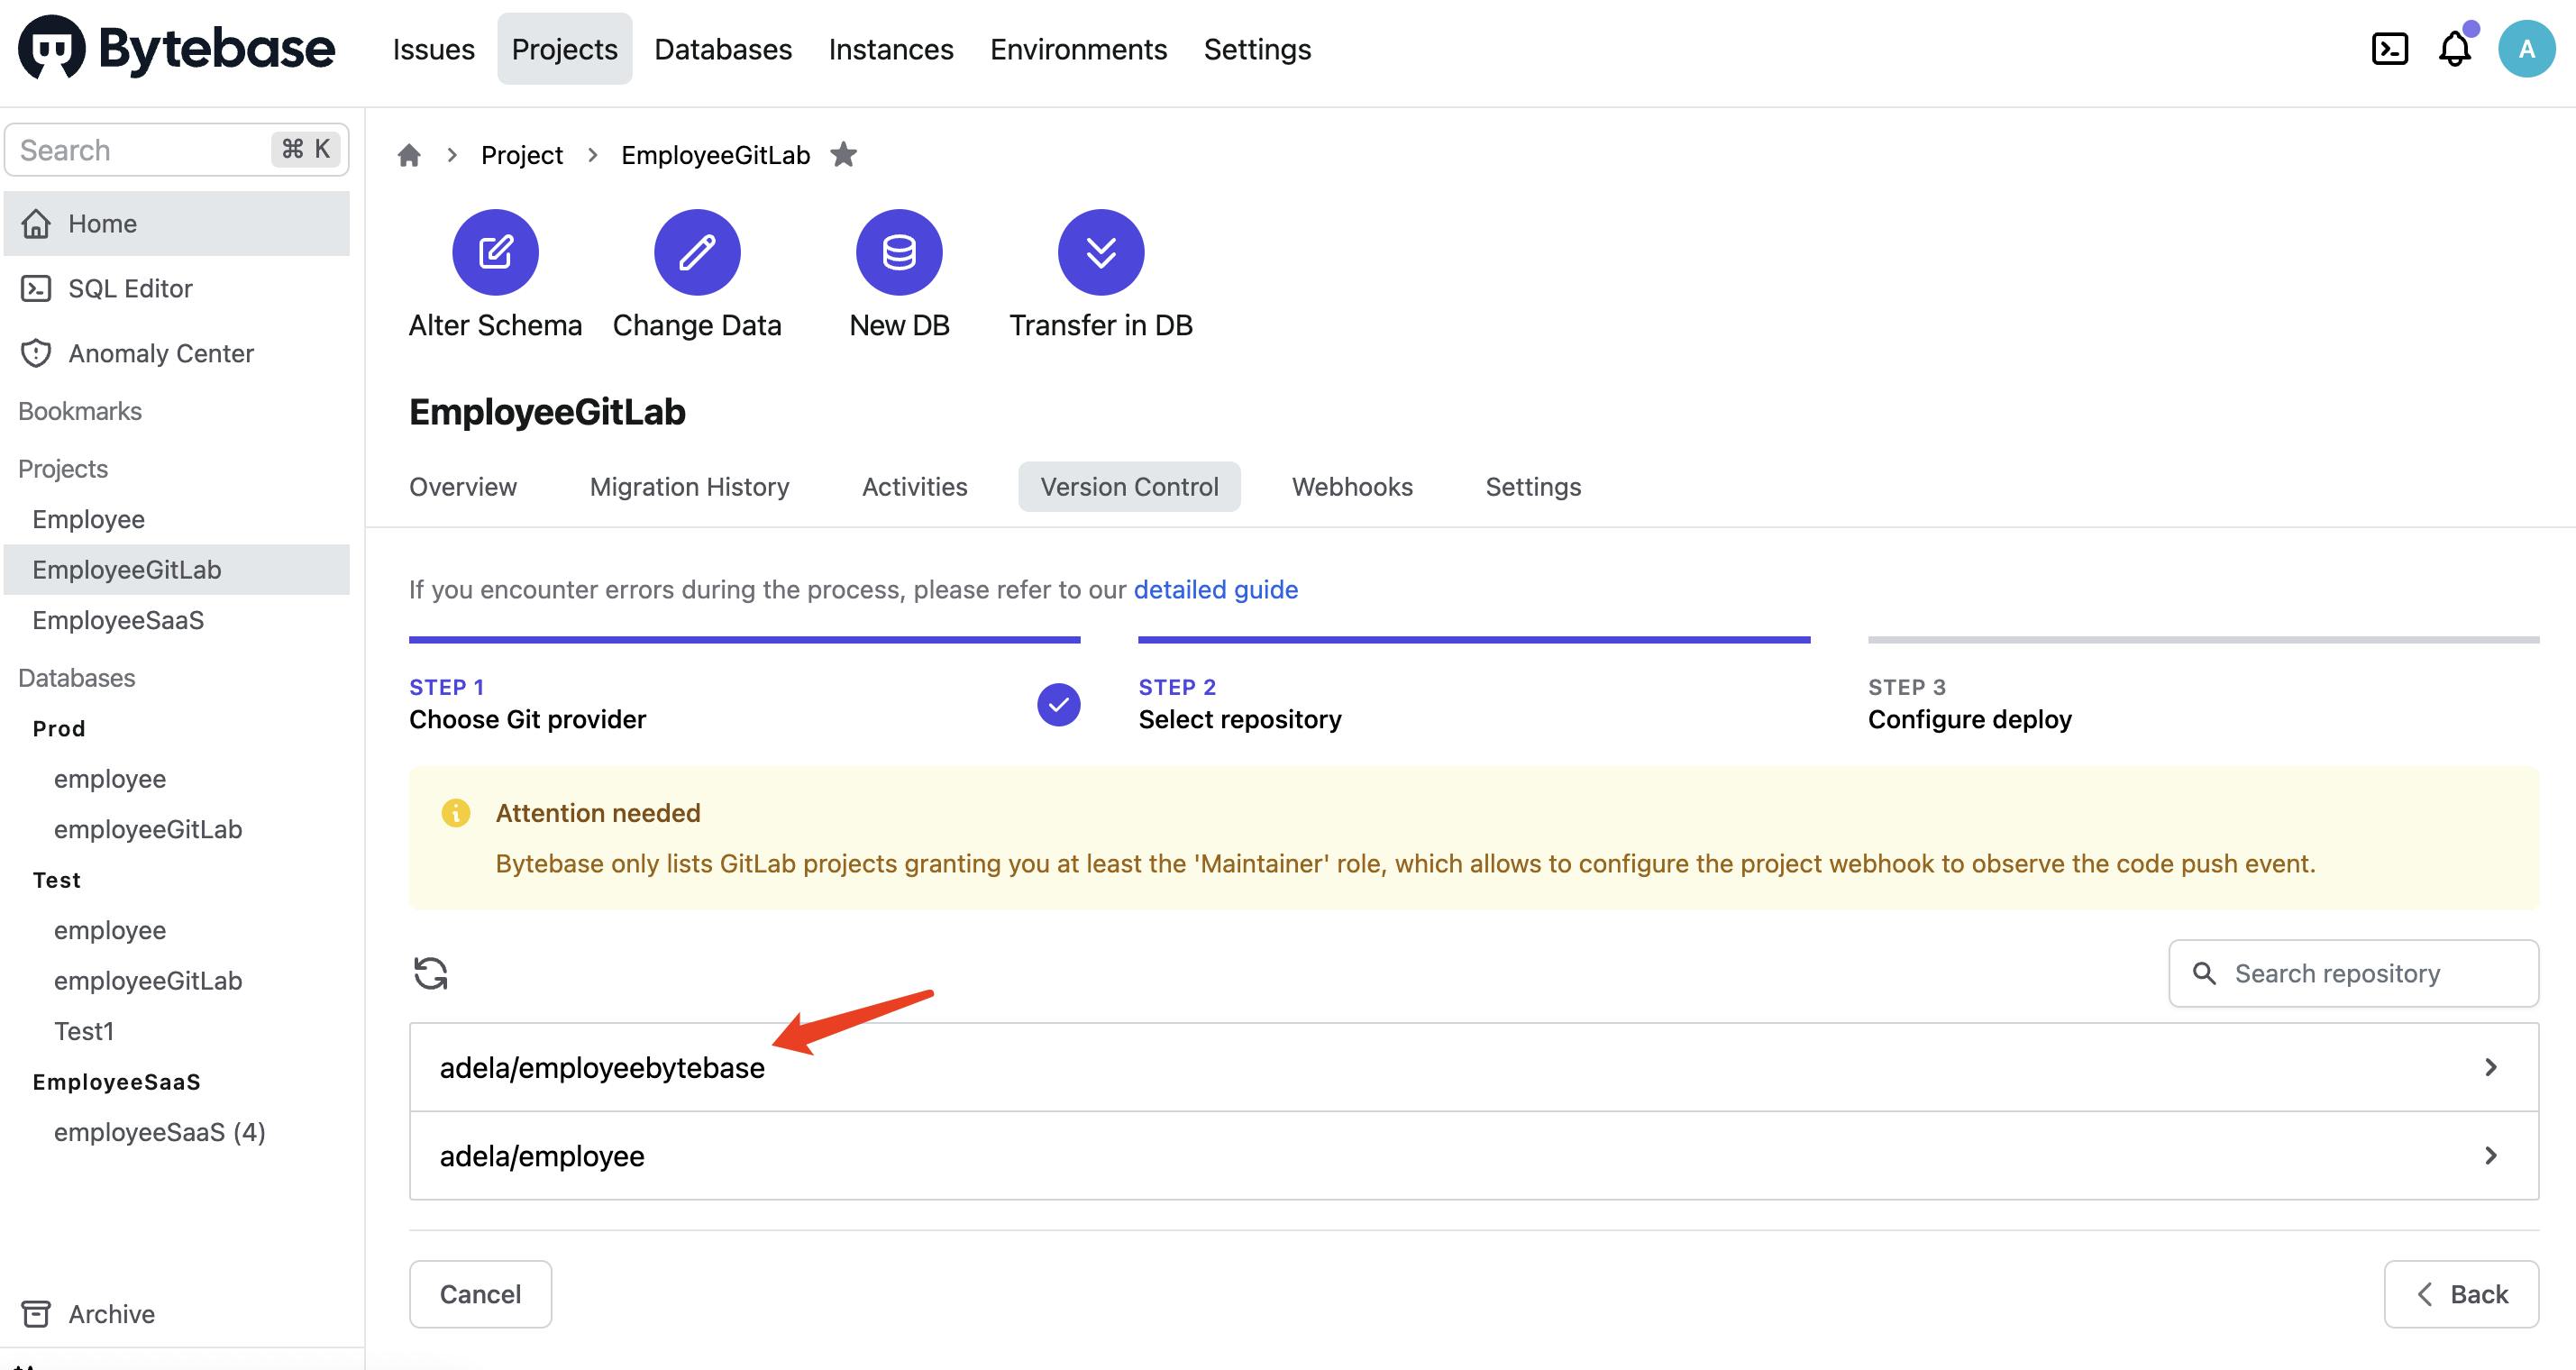
Choose the GitLab project we just created.
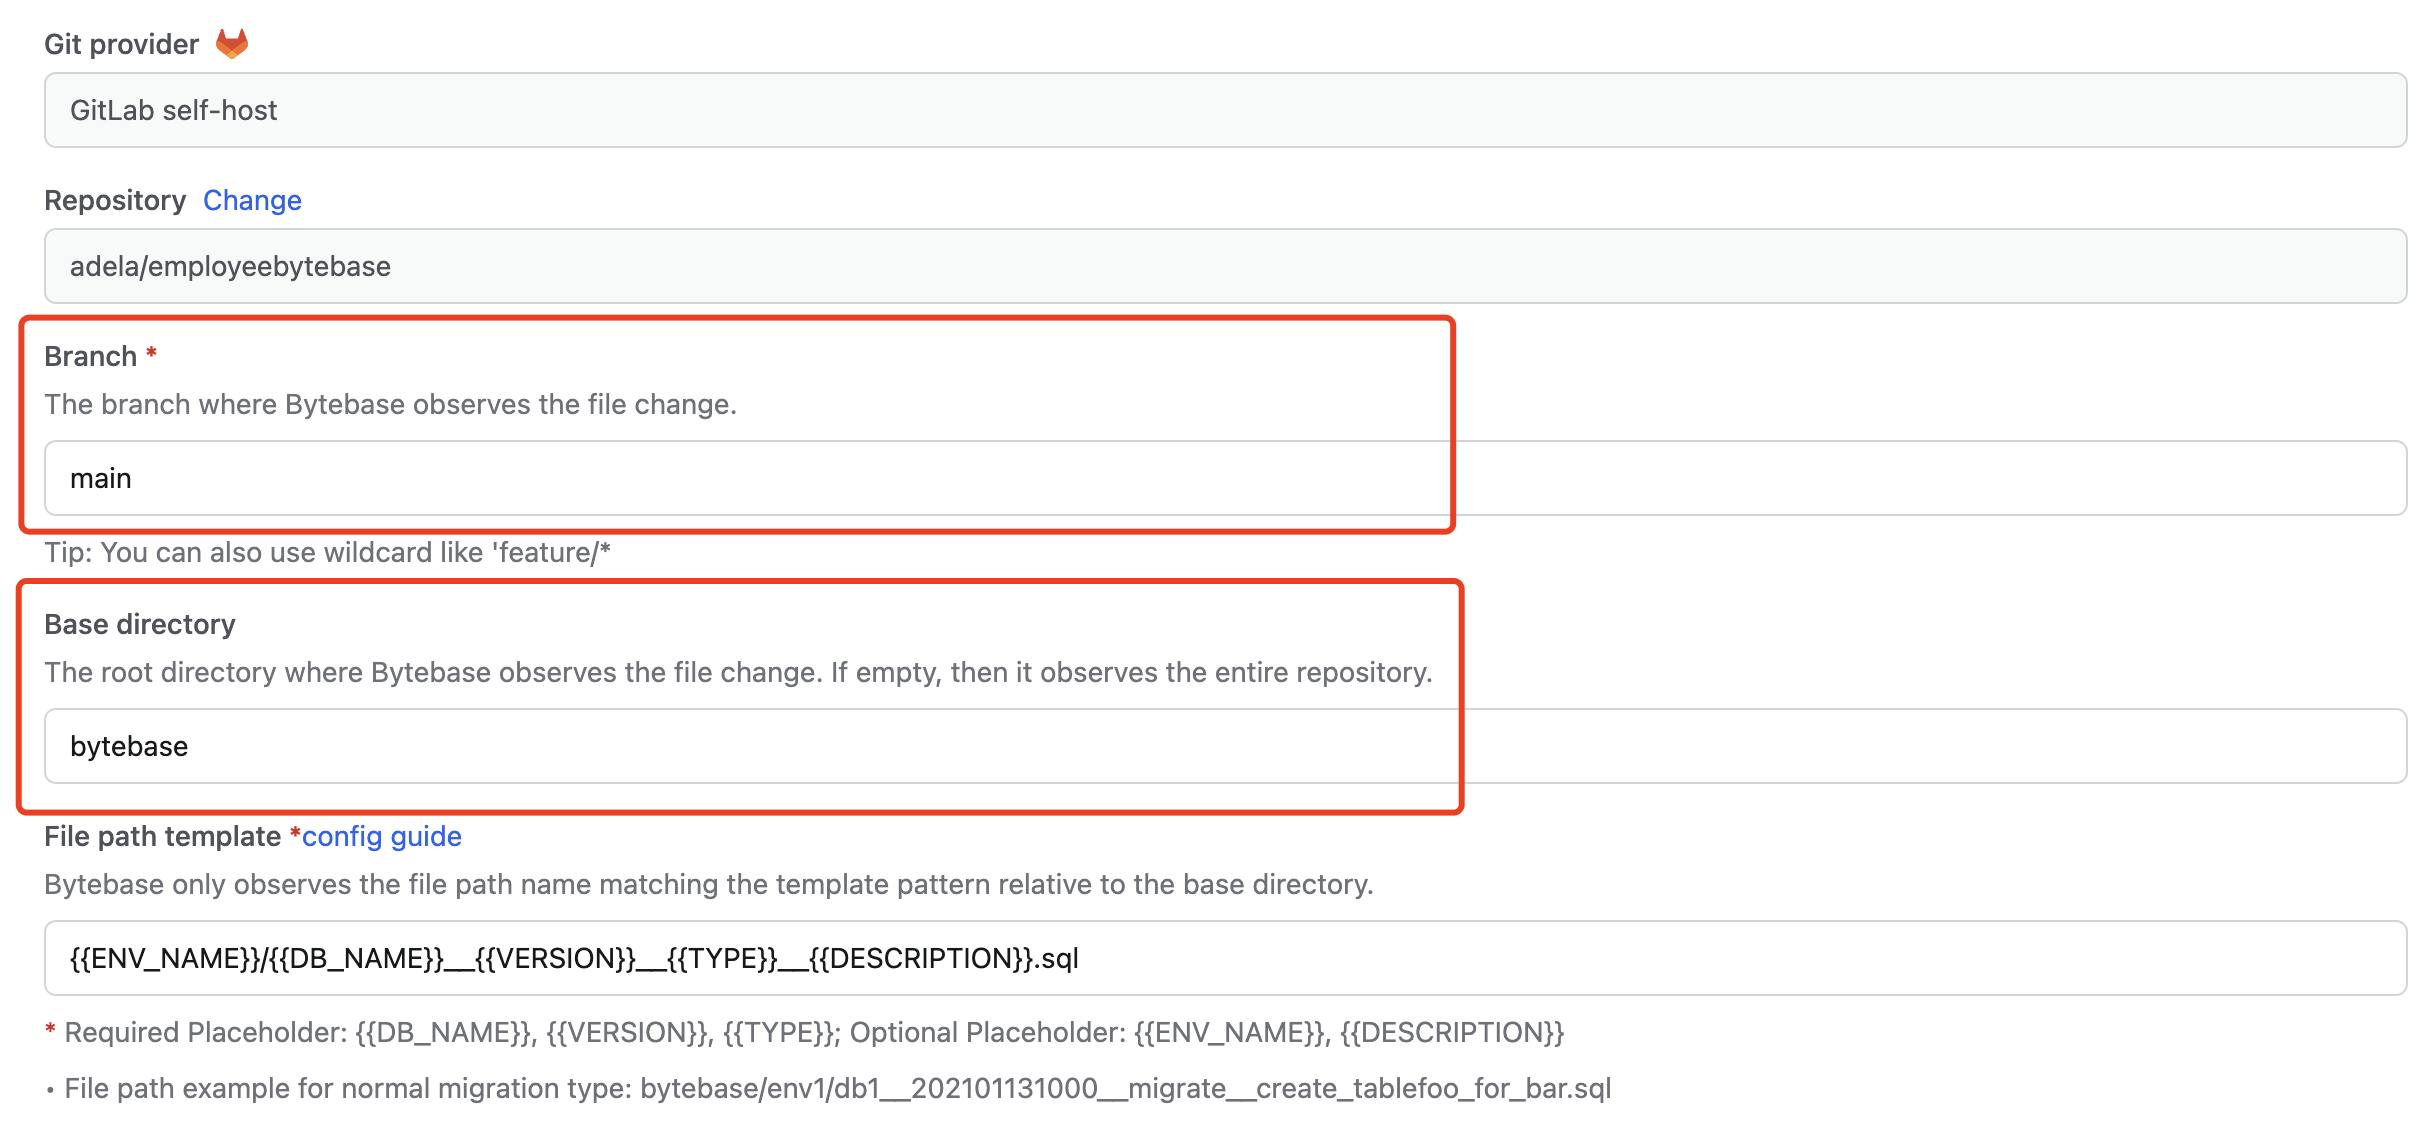
- Make sure the branch is correct. The default base directory is bytebase; we'll keep it.
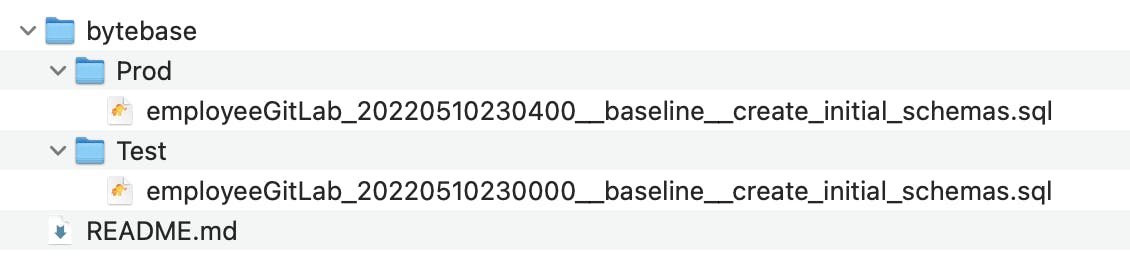
Step 3 Name and Organize Schema Files
We know that two types of schema files are needed following the instructions.
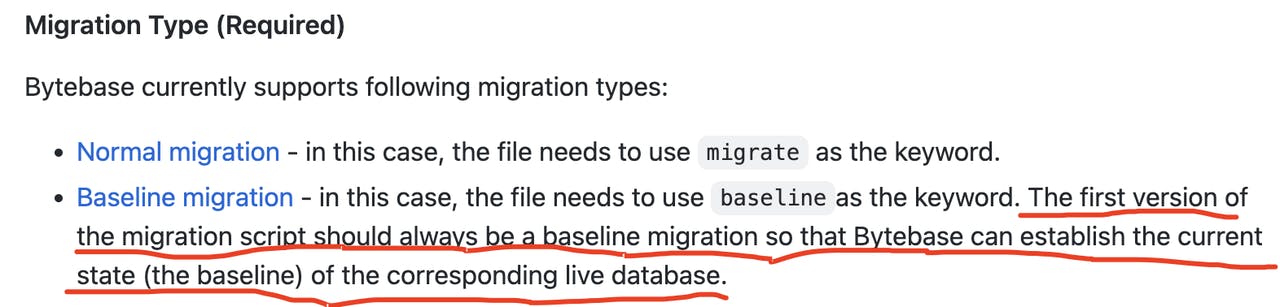
- Our first script should be a baseline migration script and follow this format.

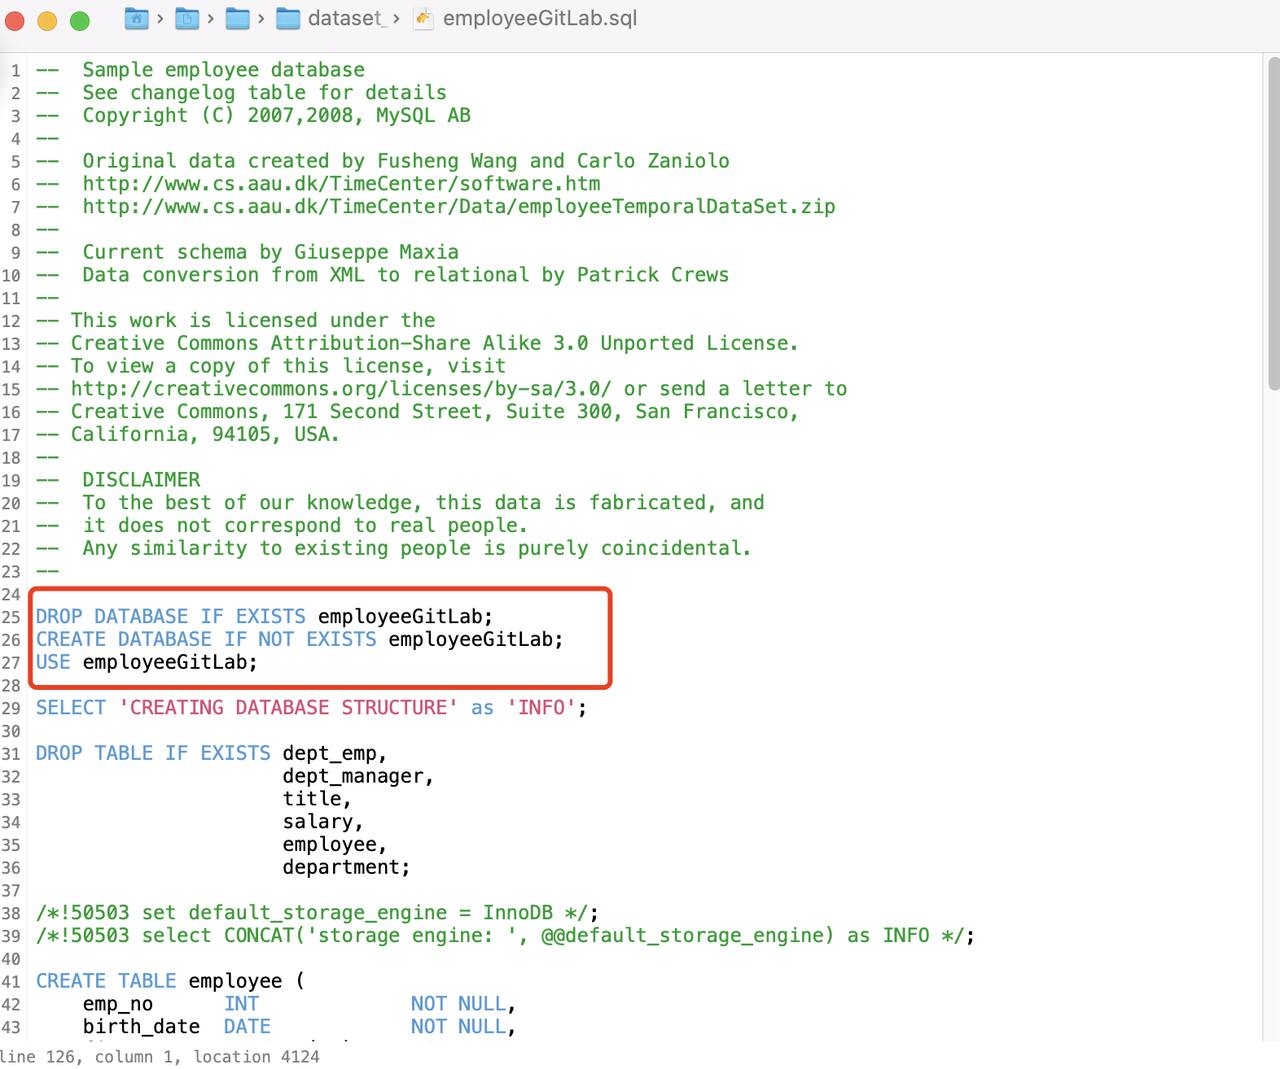
Step 4 Create the First Baseline Migration
We do a mysqldump for our current two databases and rename them. For this article, we follow the recommended structure in our documentation.
This is ours.
We commit and push.
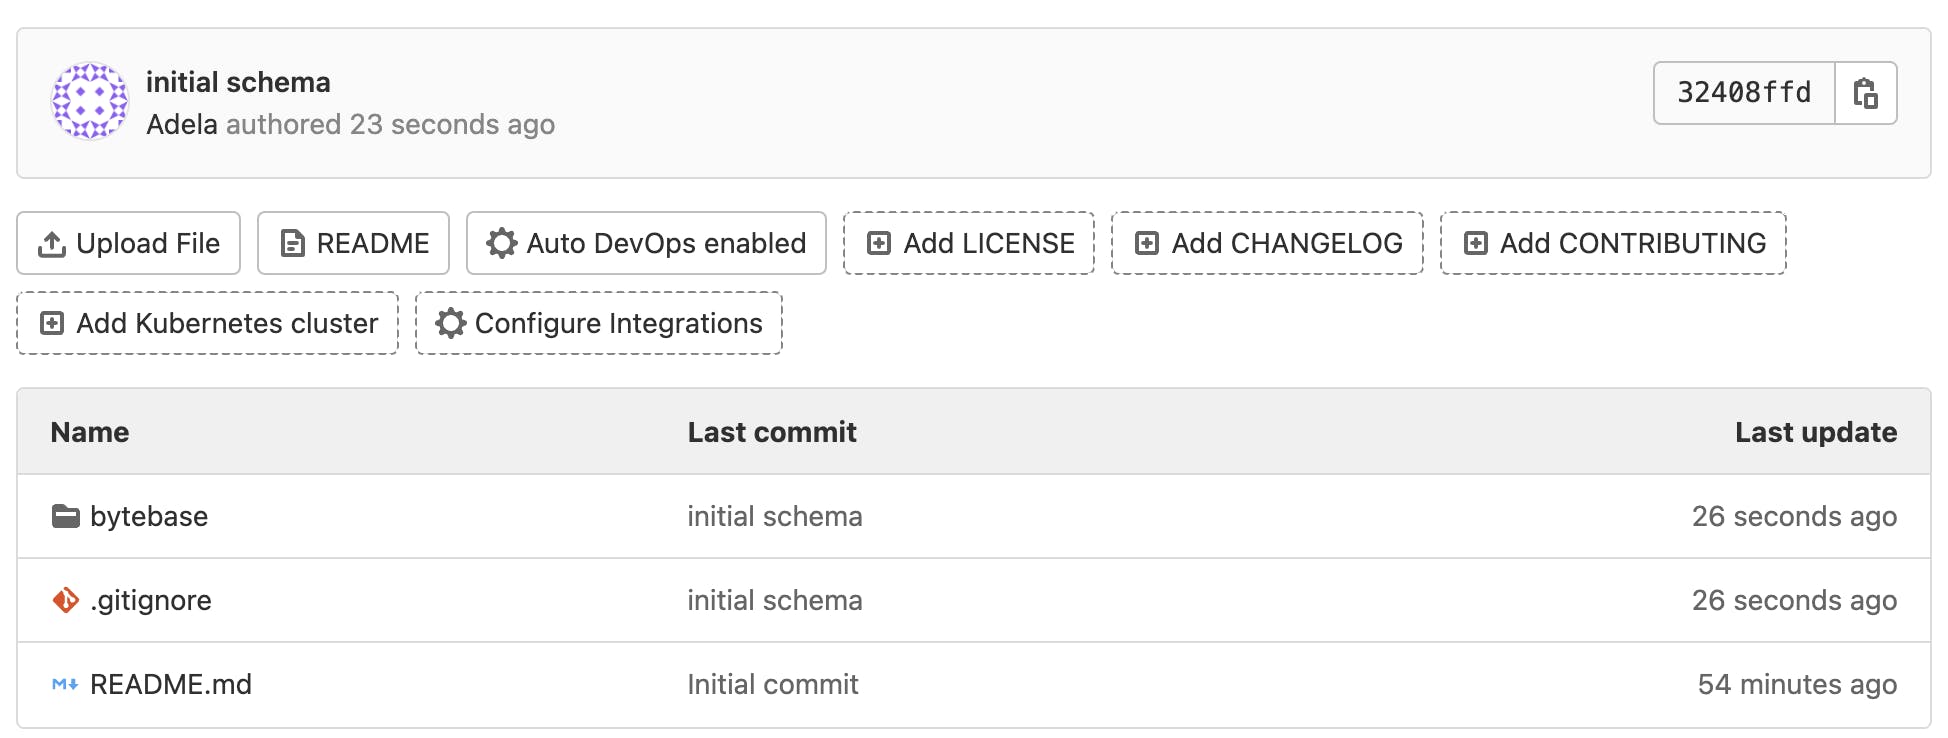
Then we come back to our project home page, ah! In Recent activities, there is something wrong. Yes, our file names don't match the template.

- Let's fix this by adding one more '_', commit, and push again.

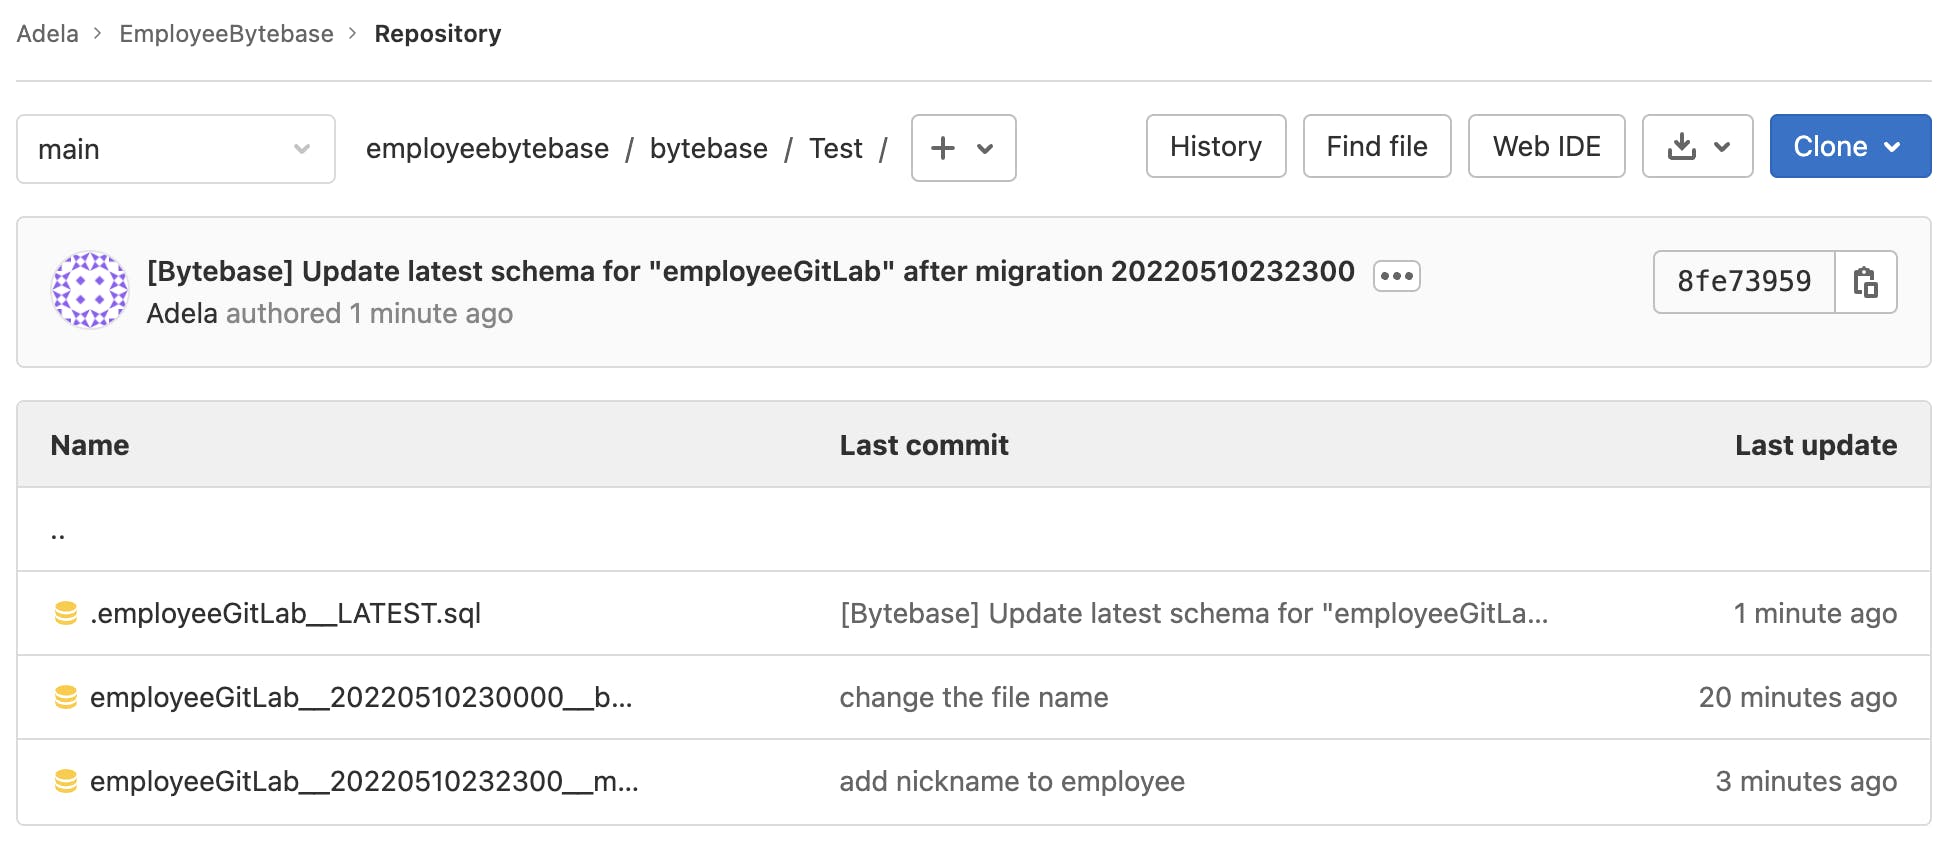
- If we view the files in GitLab, we see Bytebase created a new LATEST SQL automatically.
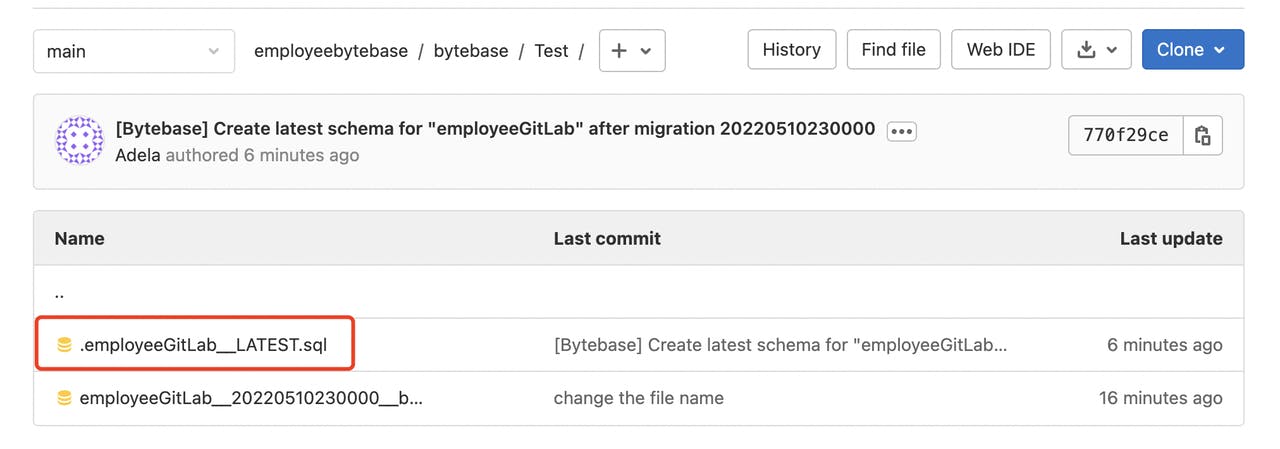
- It's explained in the documentation.

- After we change the file names and push them to GitLab. Bytebase finally receives the trigger and creates issues automatically.
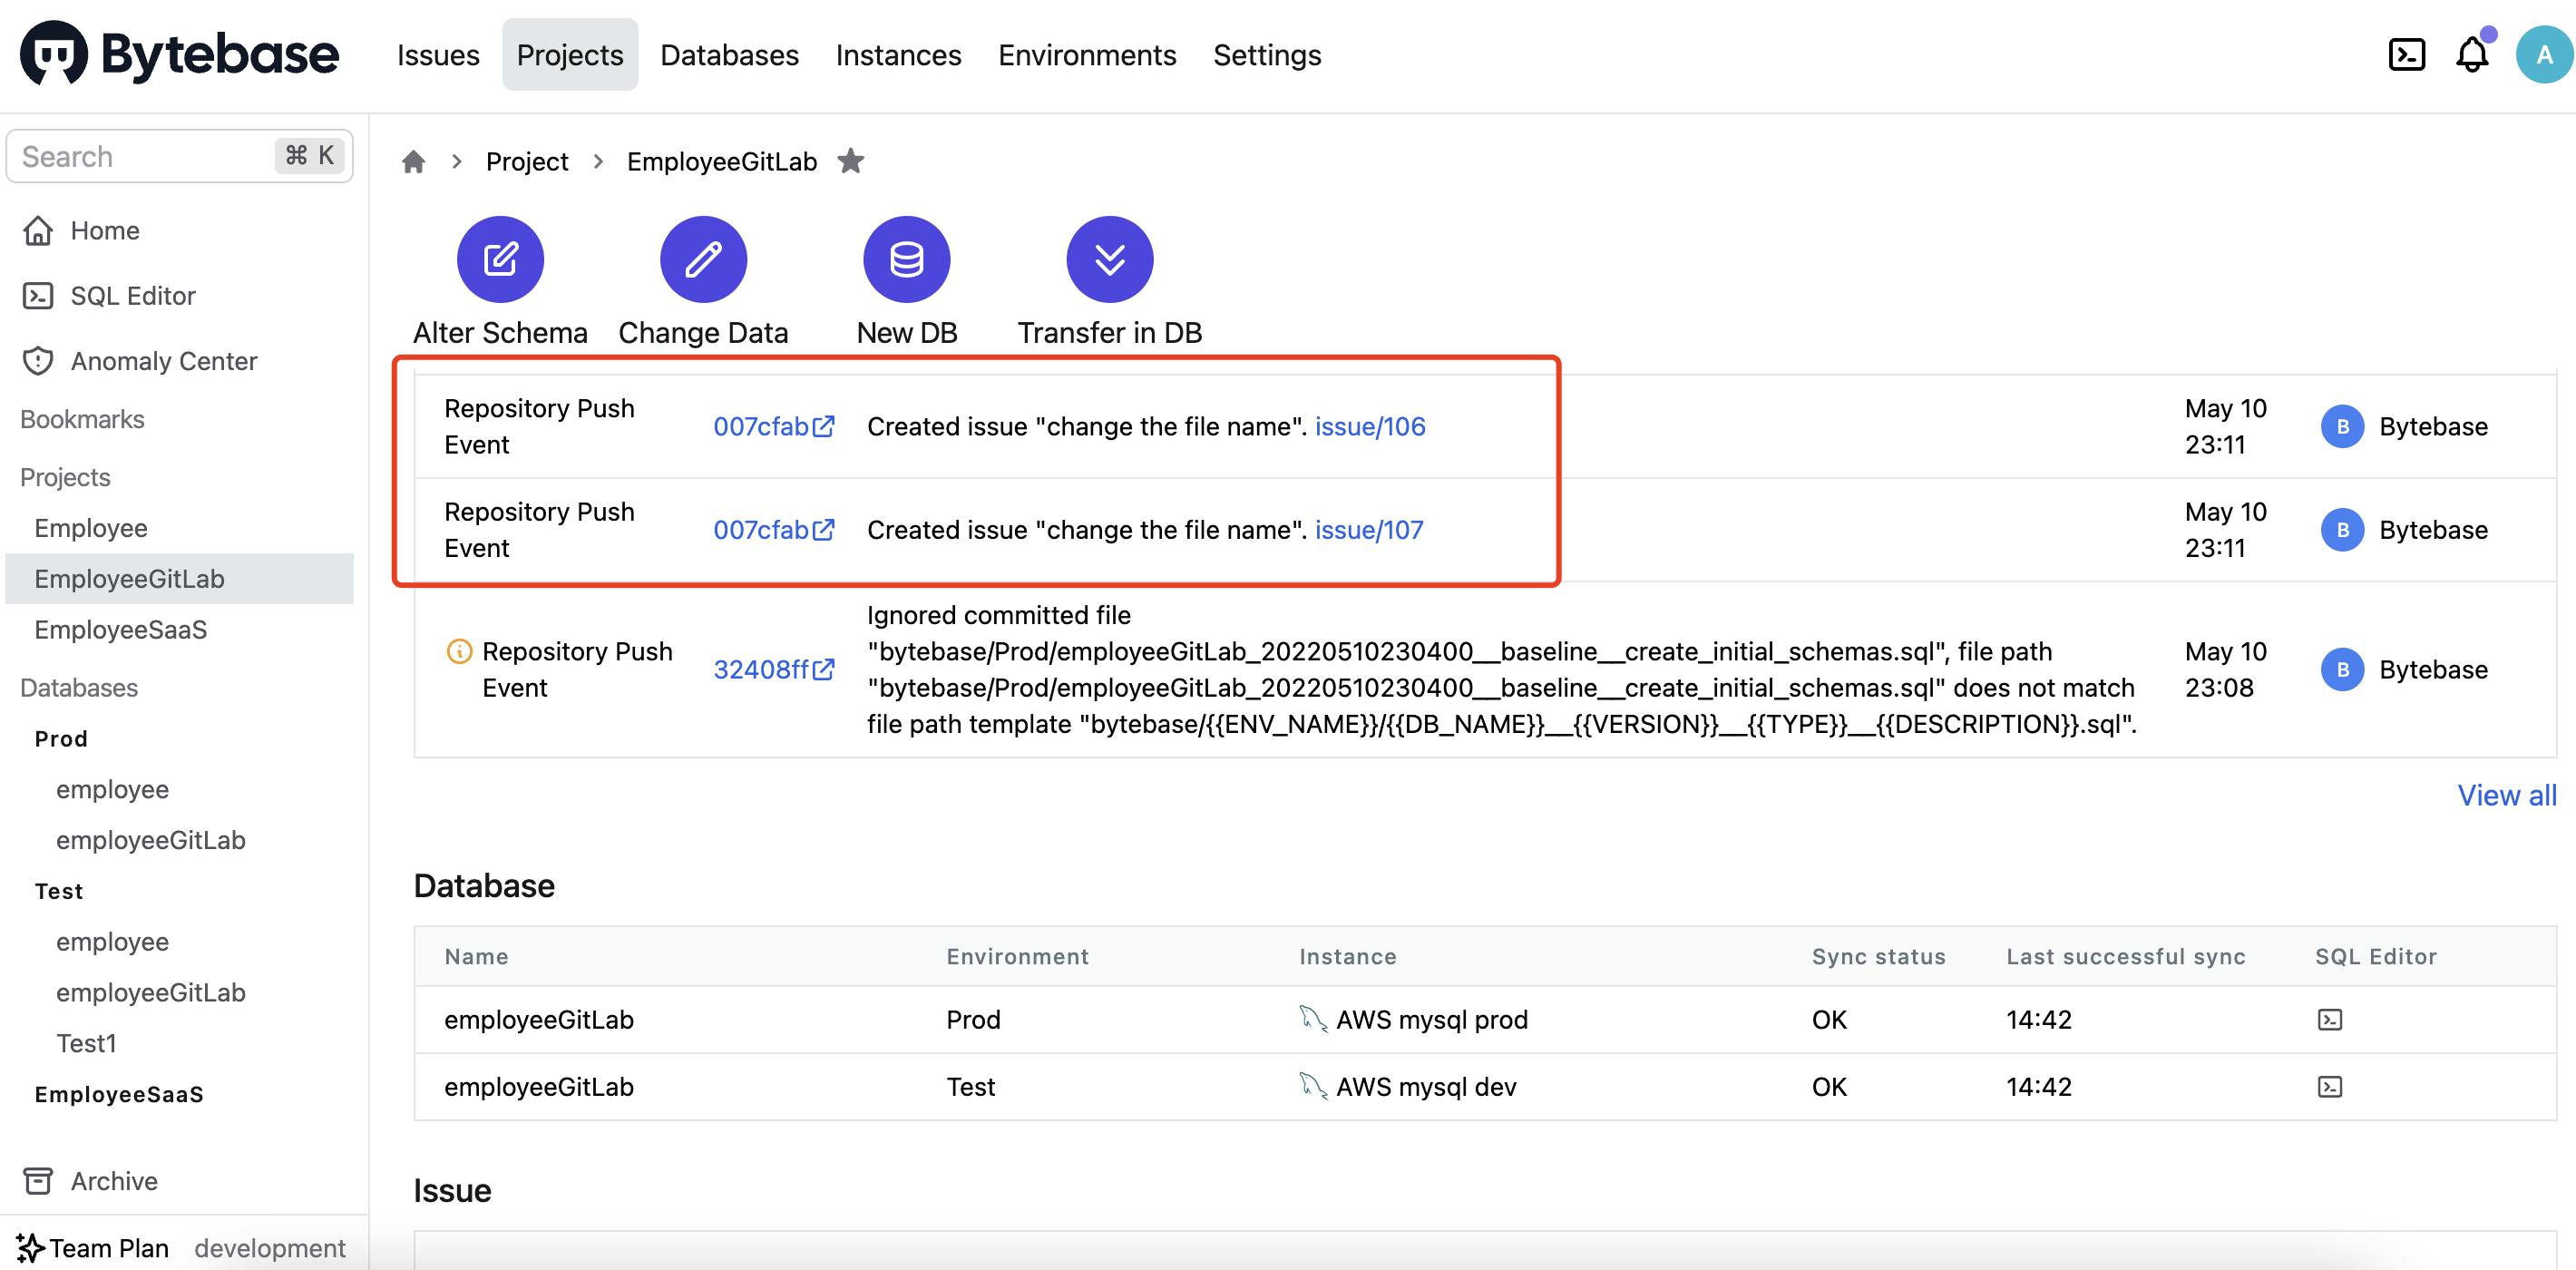
- Clicking issue/107 brings us to the issue detail page - Test environment.
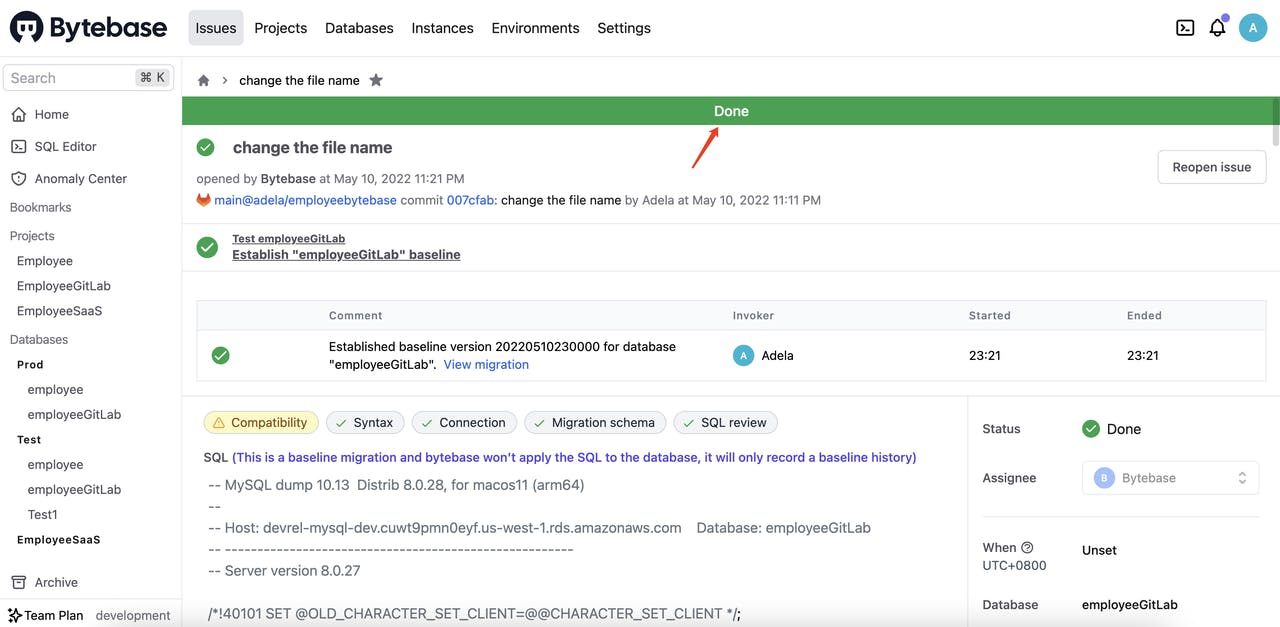
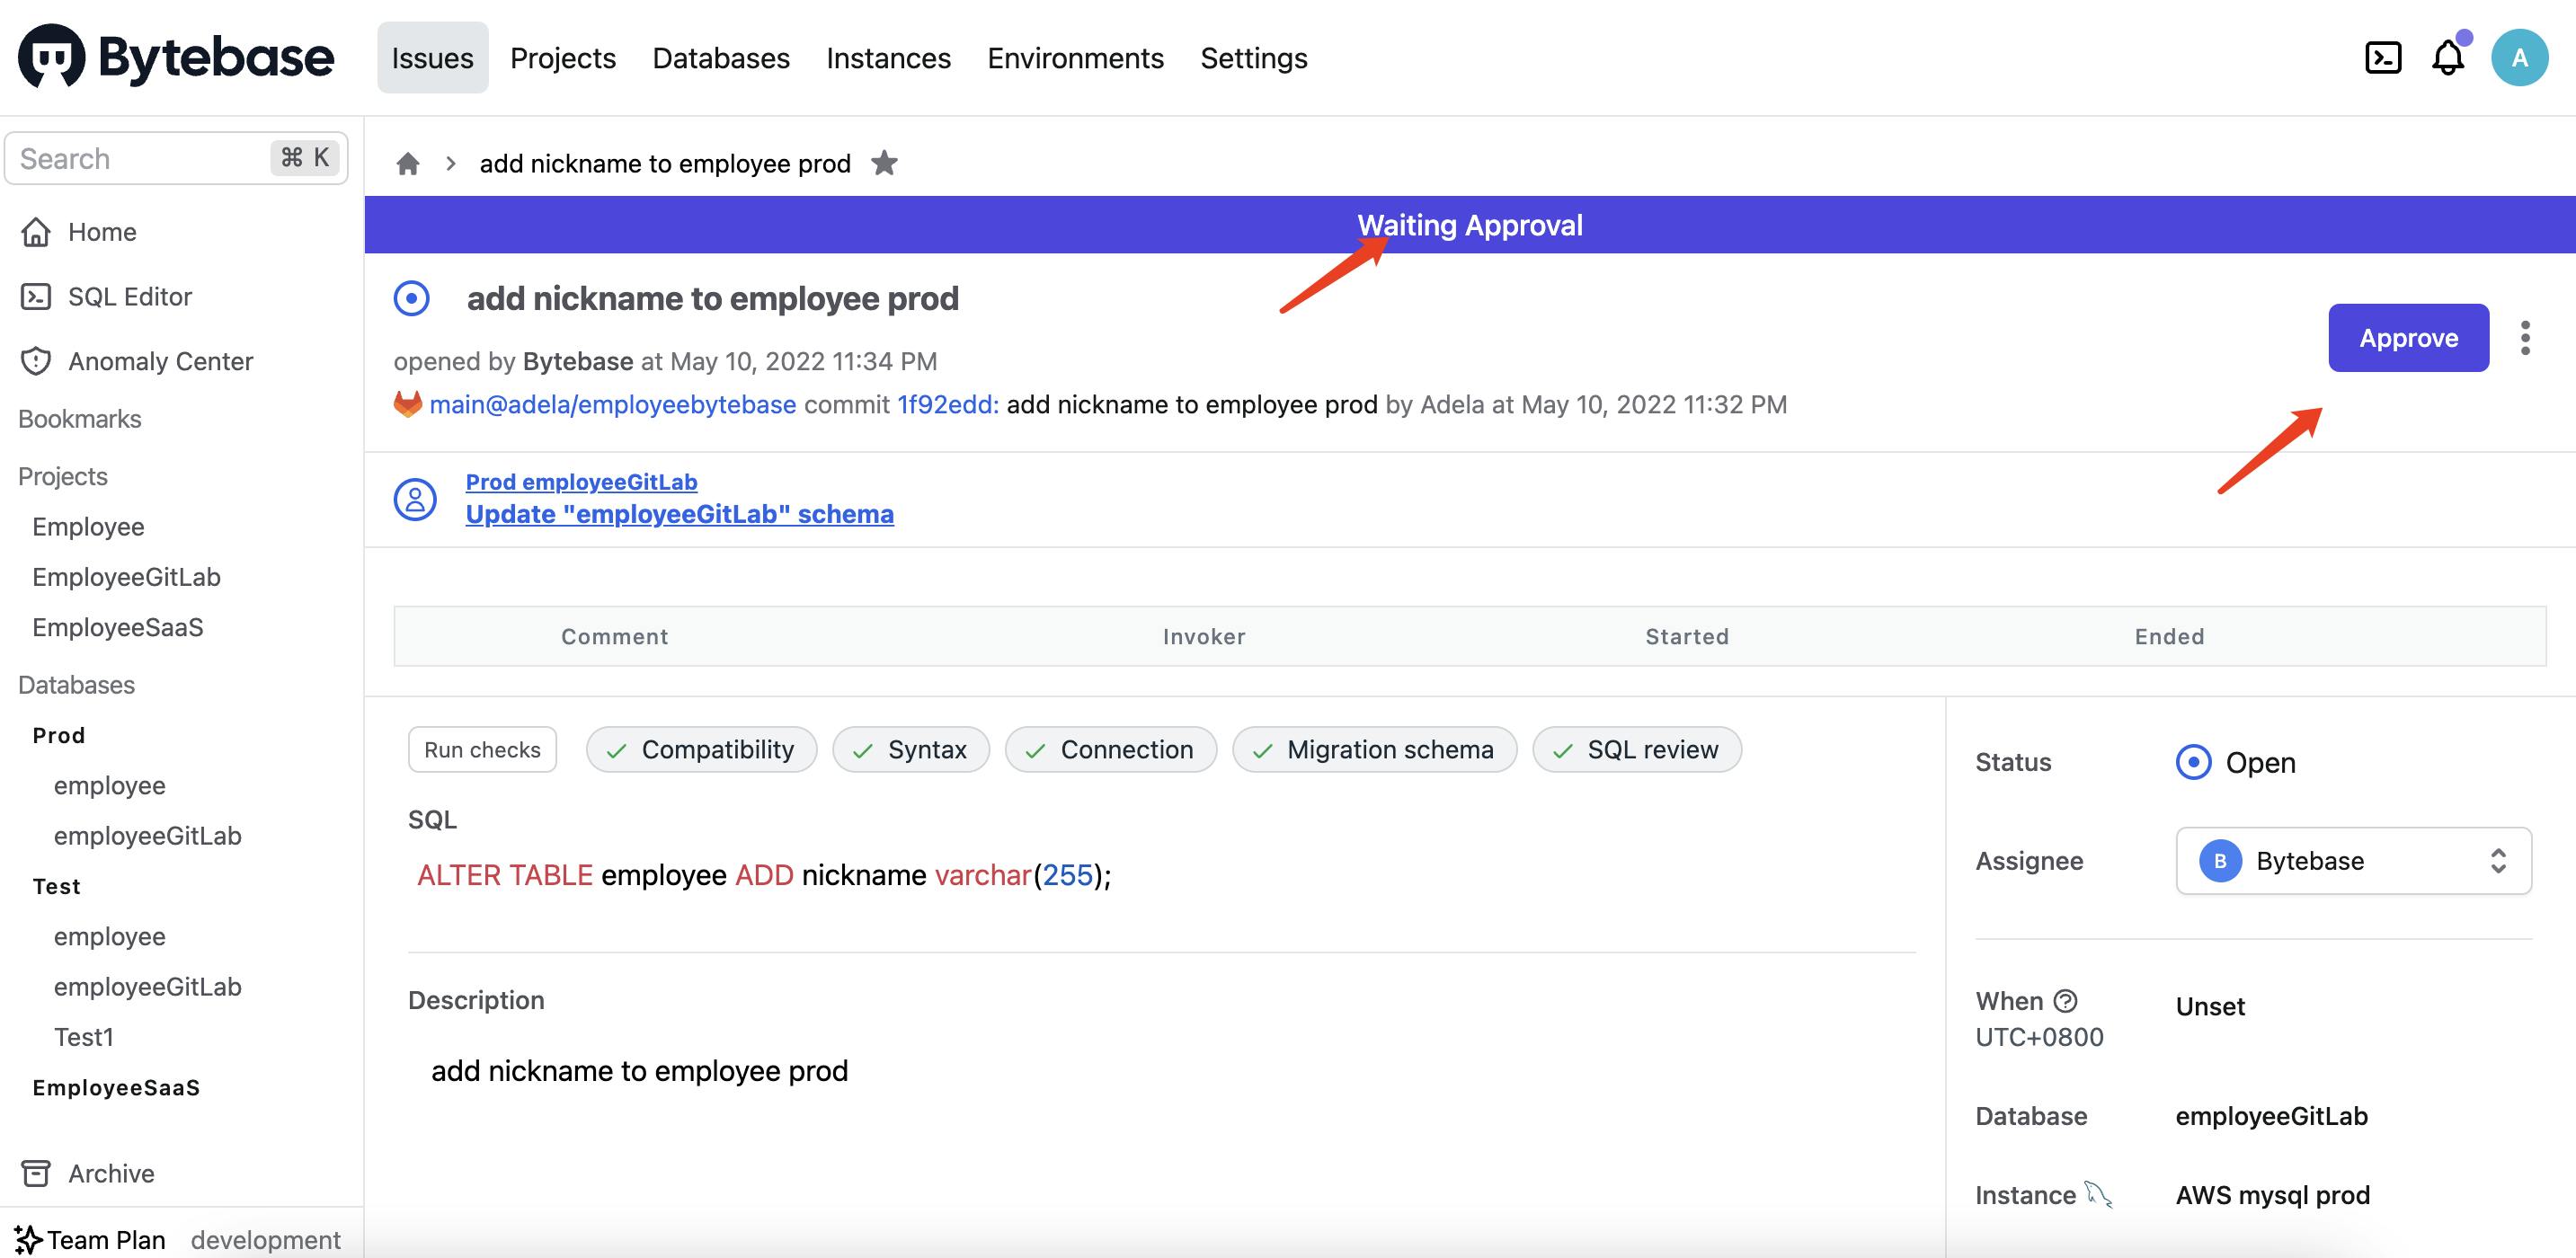
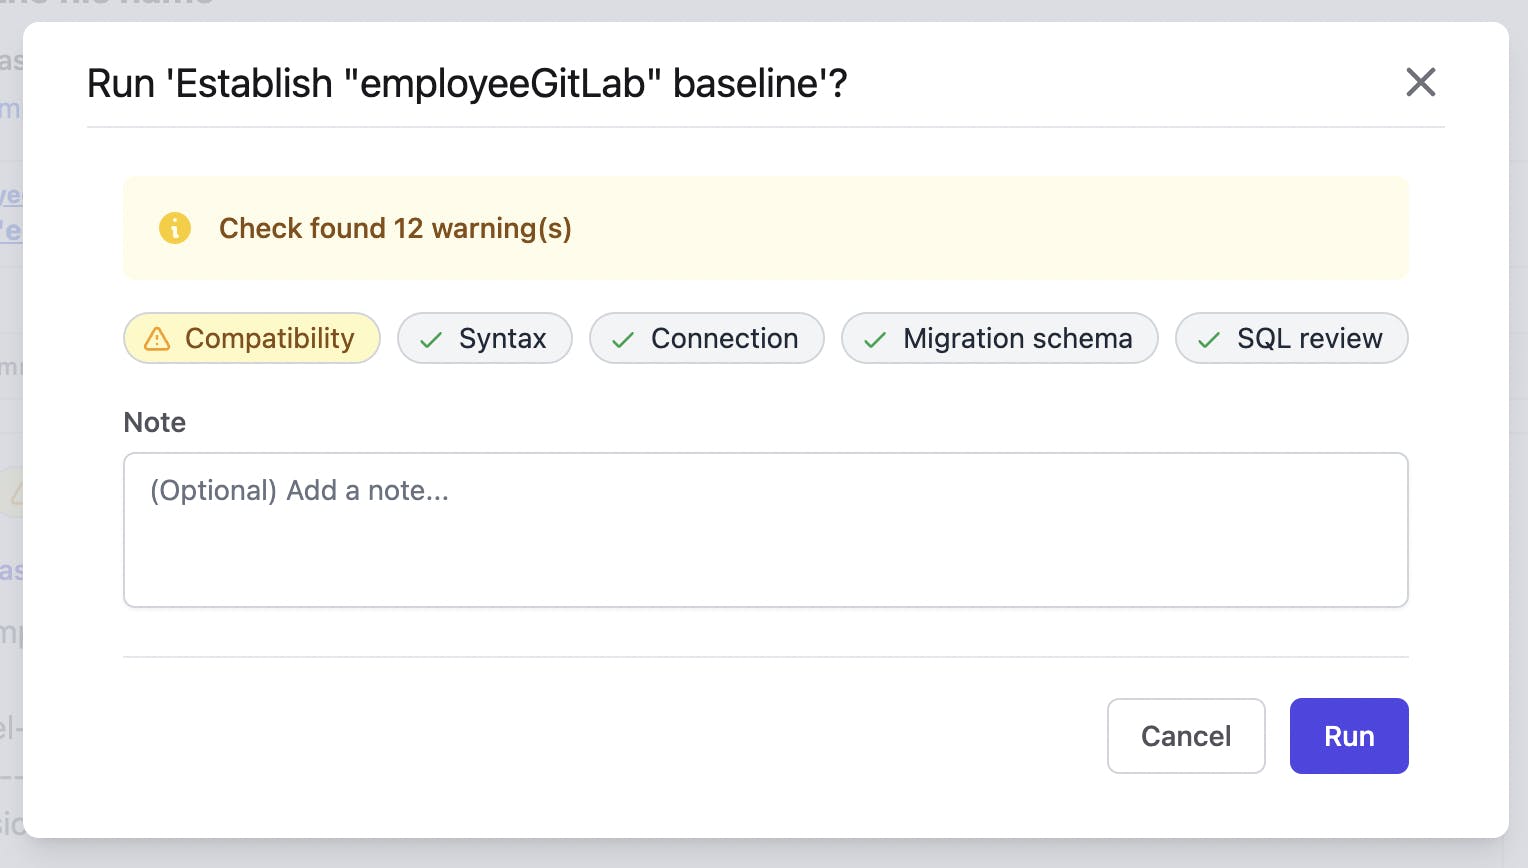
- Clicking issue/106 brings us to the Prod environment; the status is Waiting Approval. This is because we set the Prod environment to require manual approval.
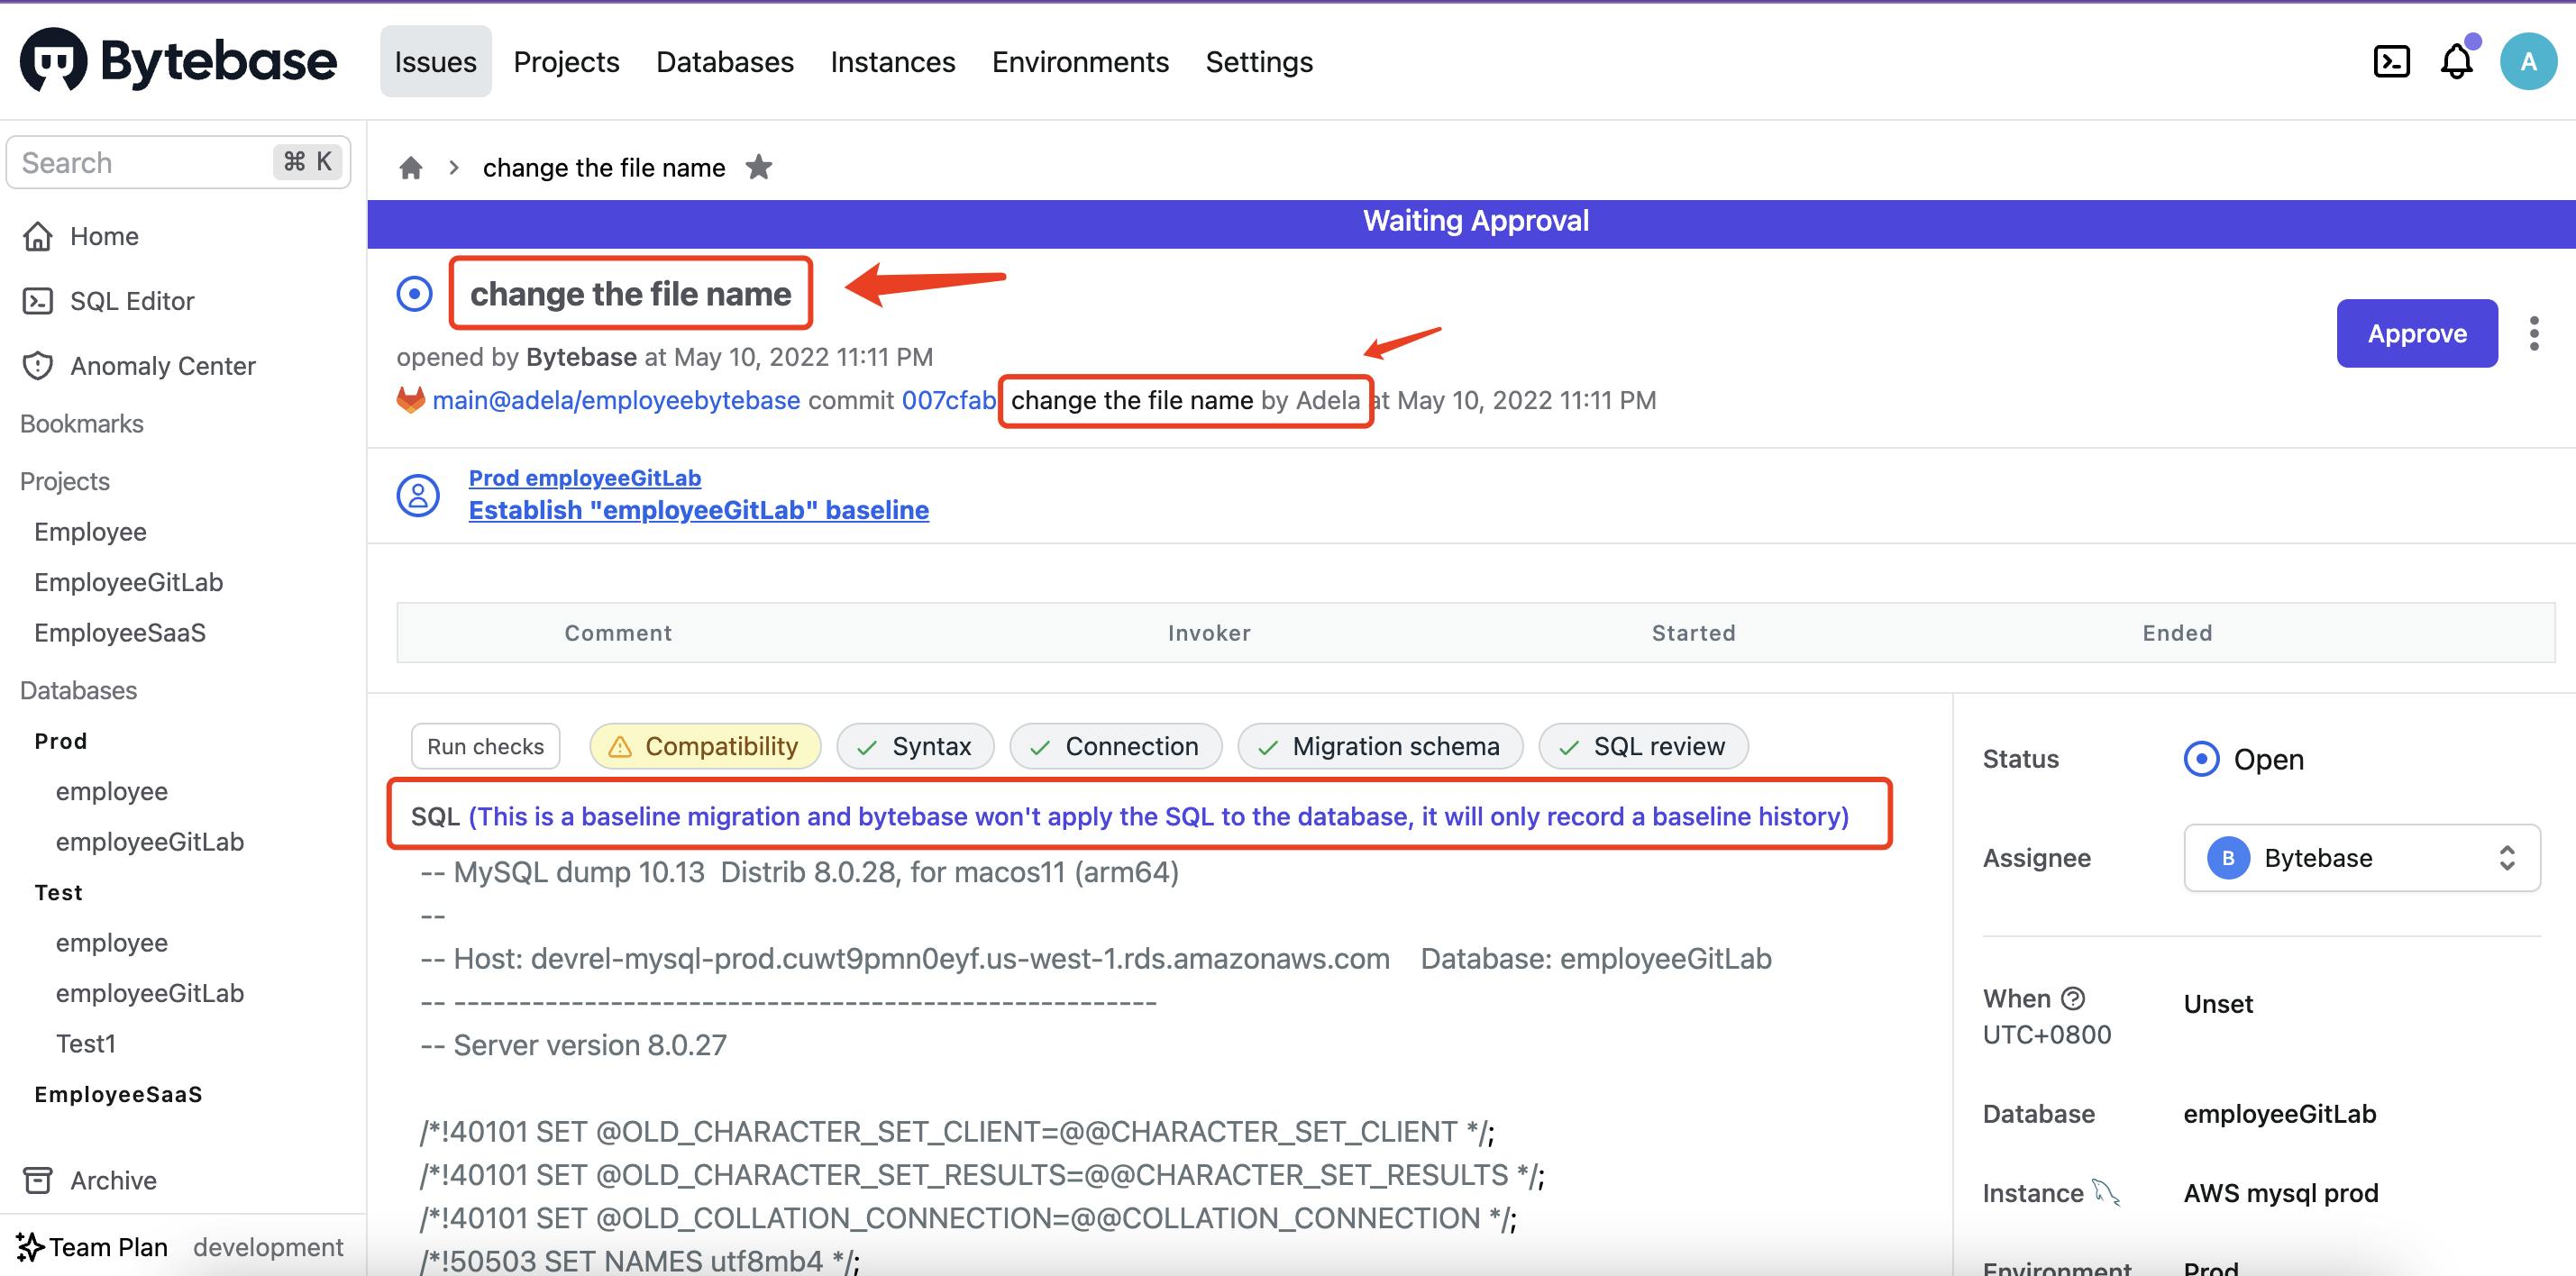
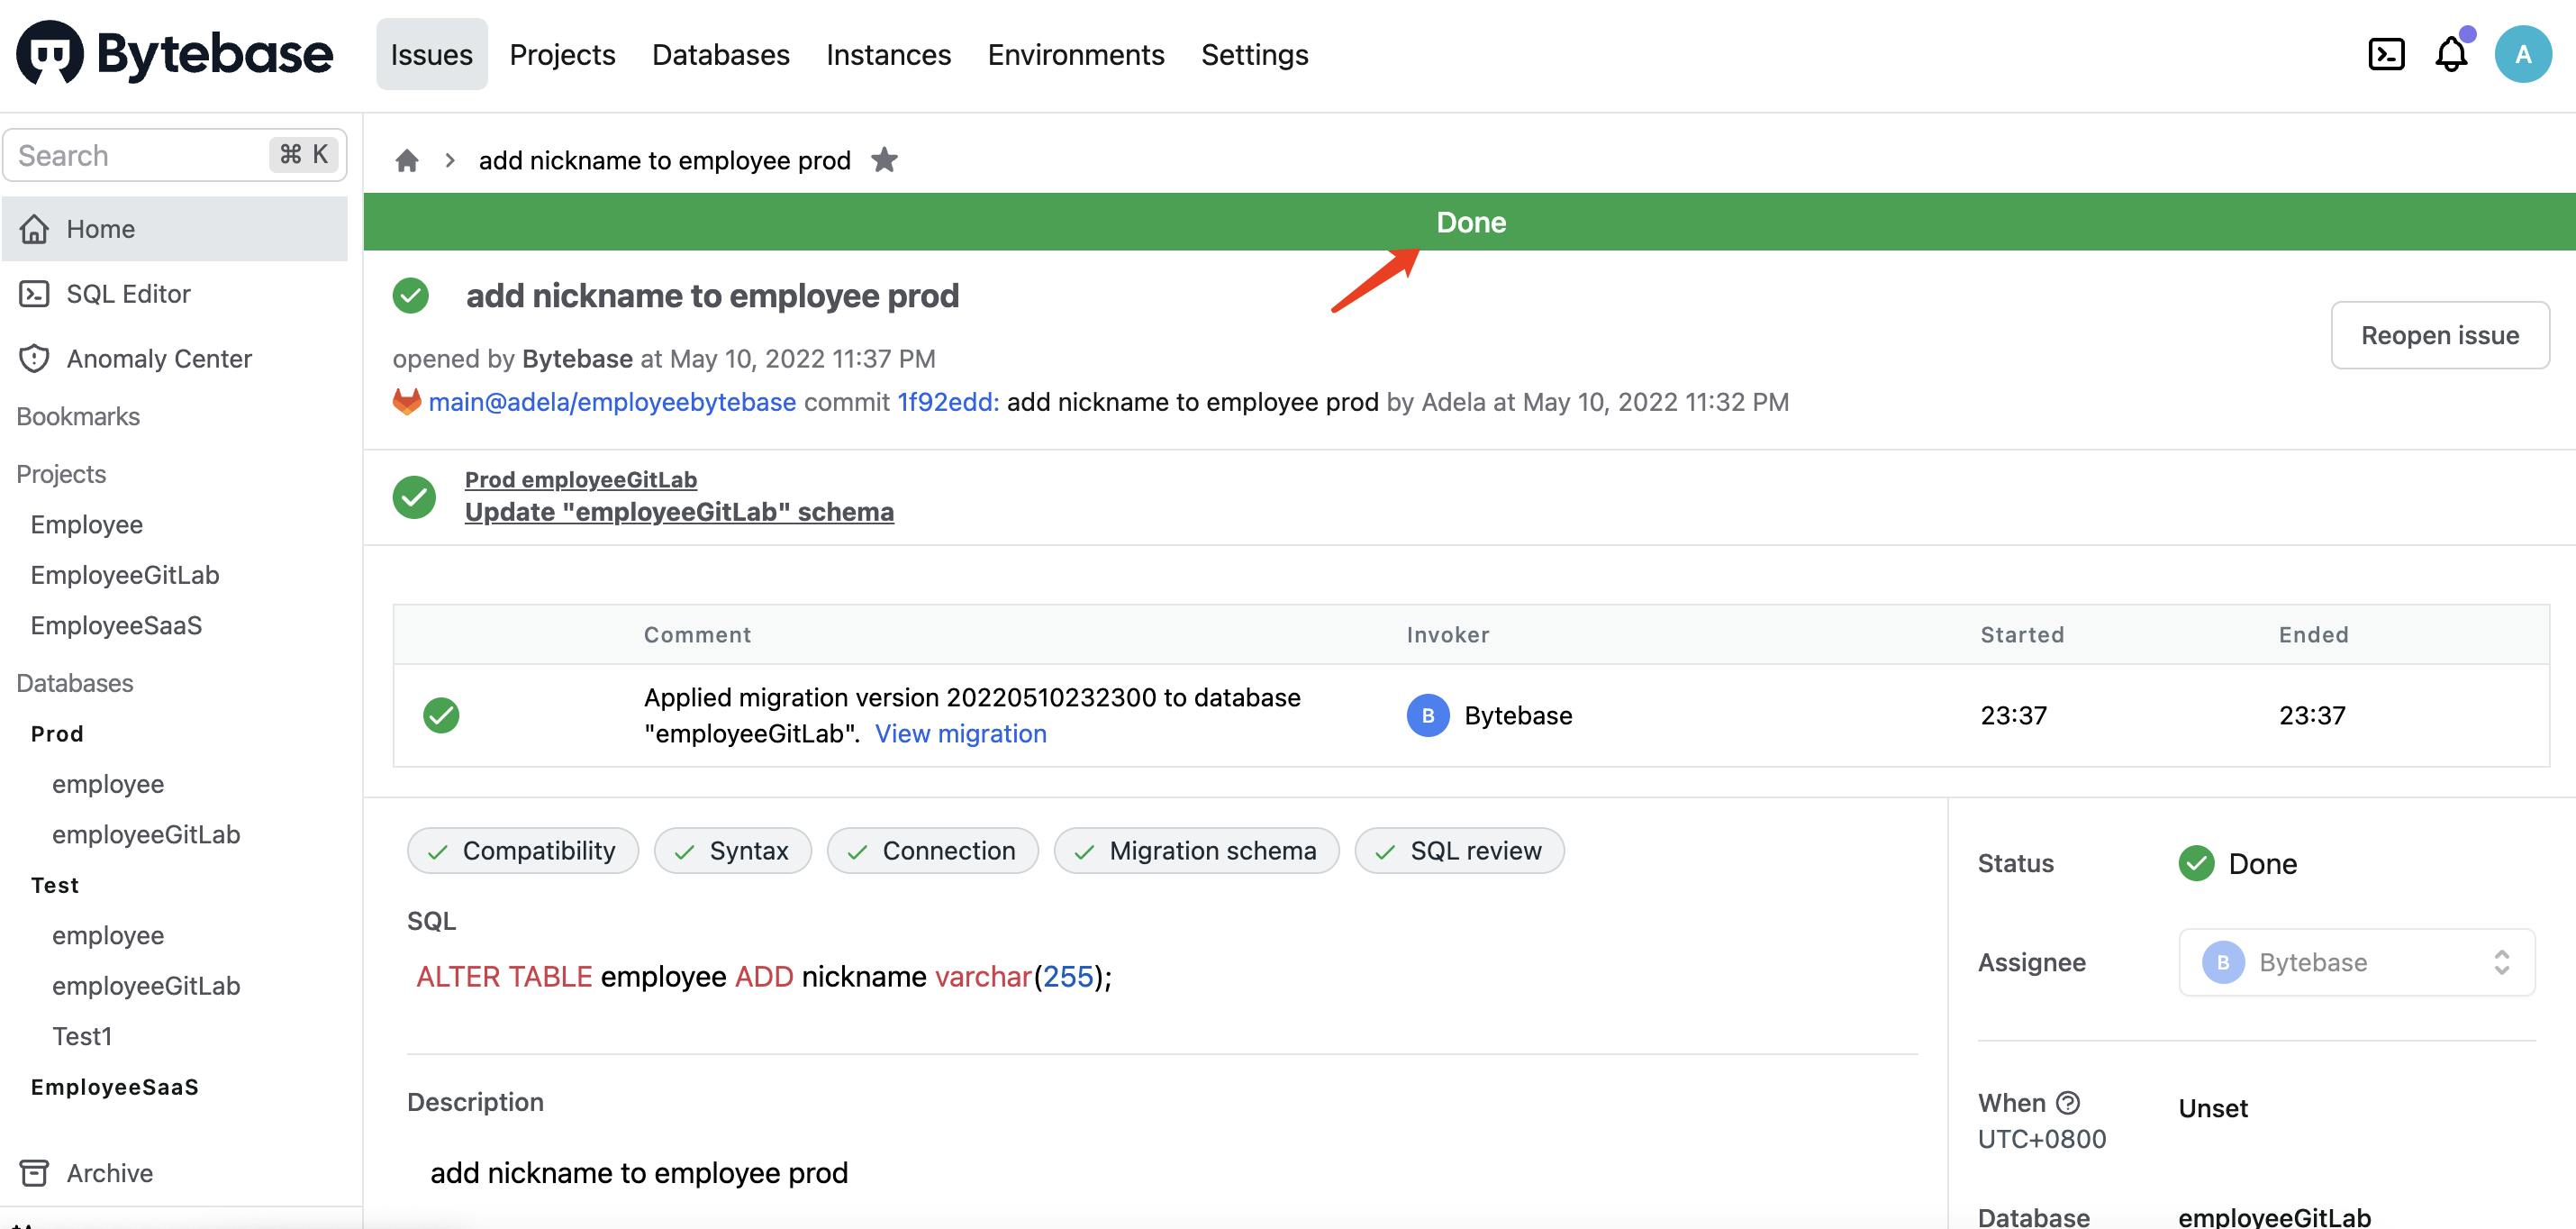
- Because we're the project owner, we have the permission to approve.
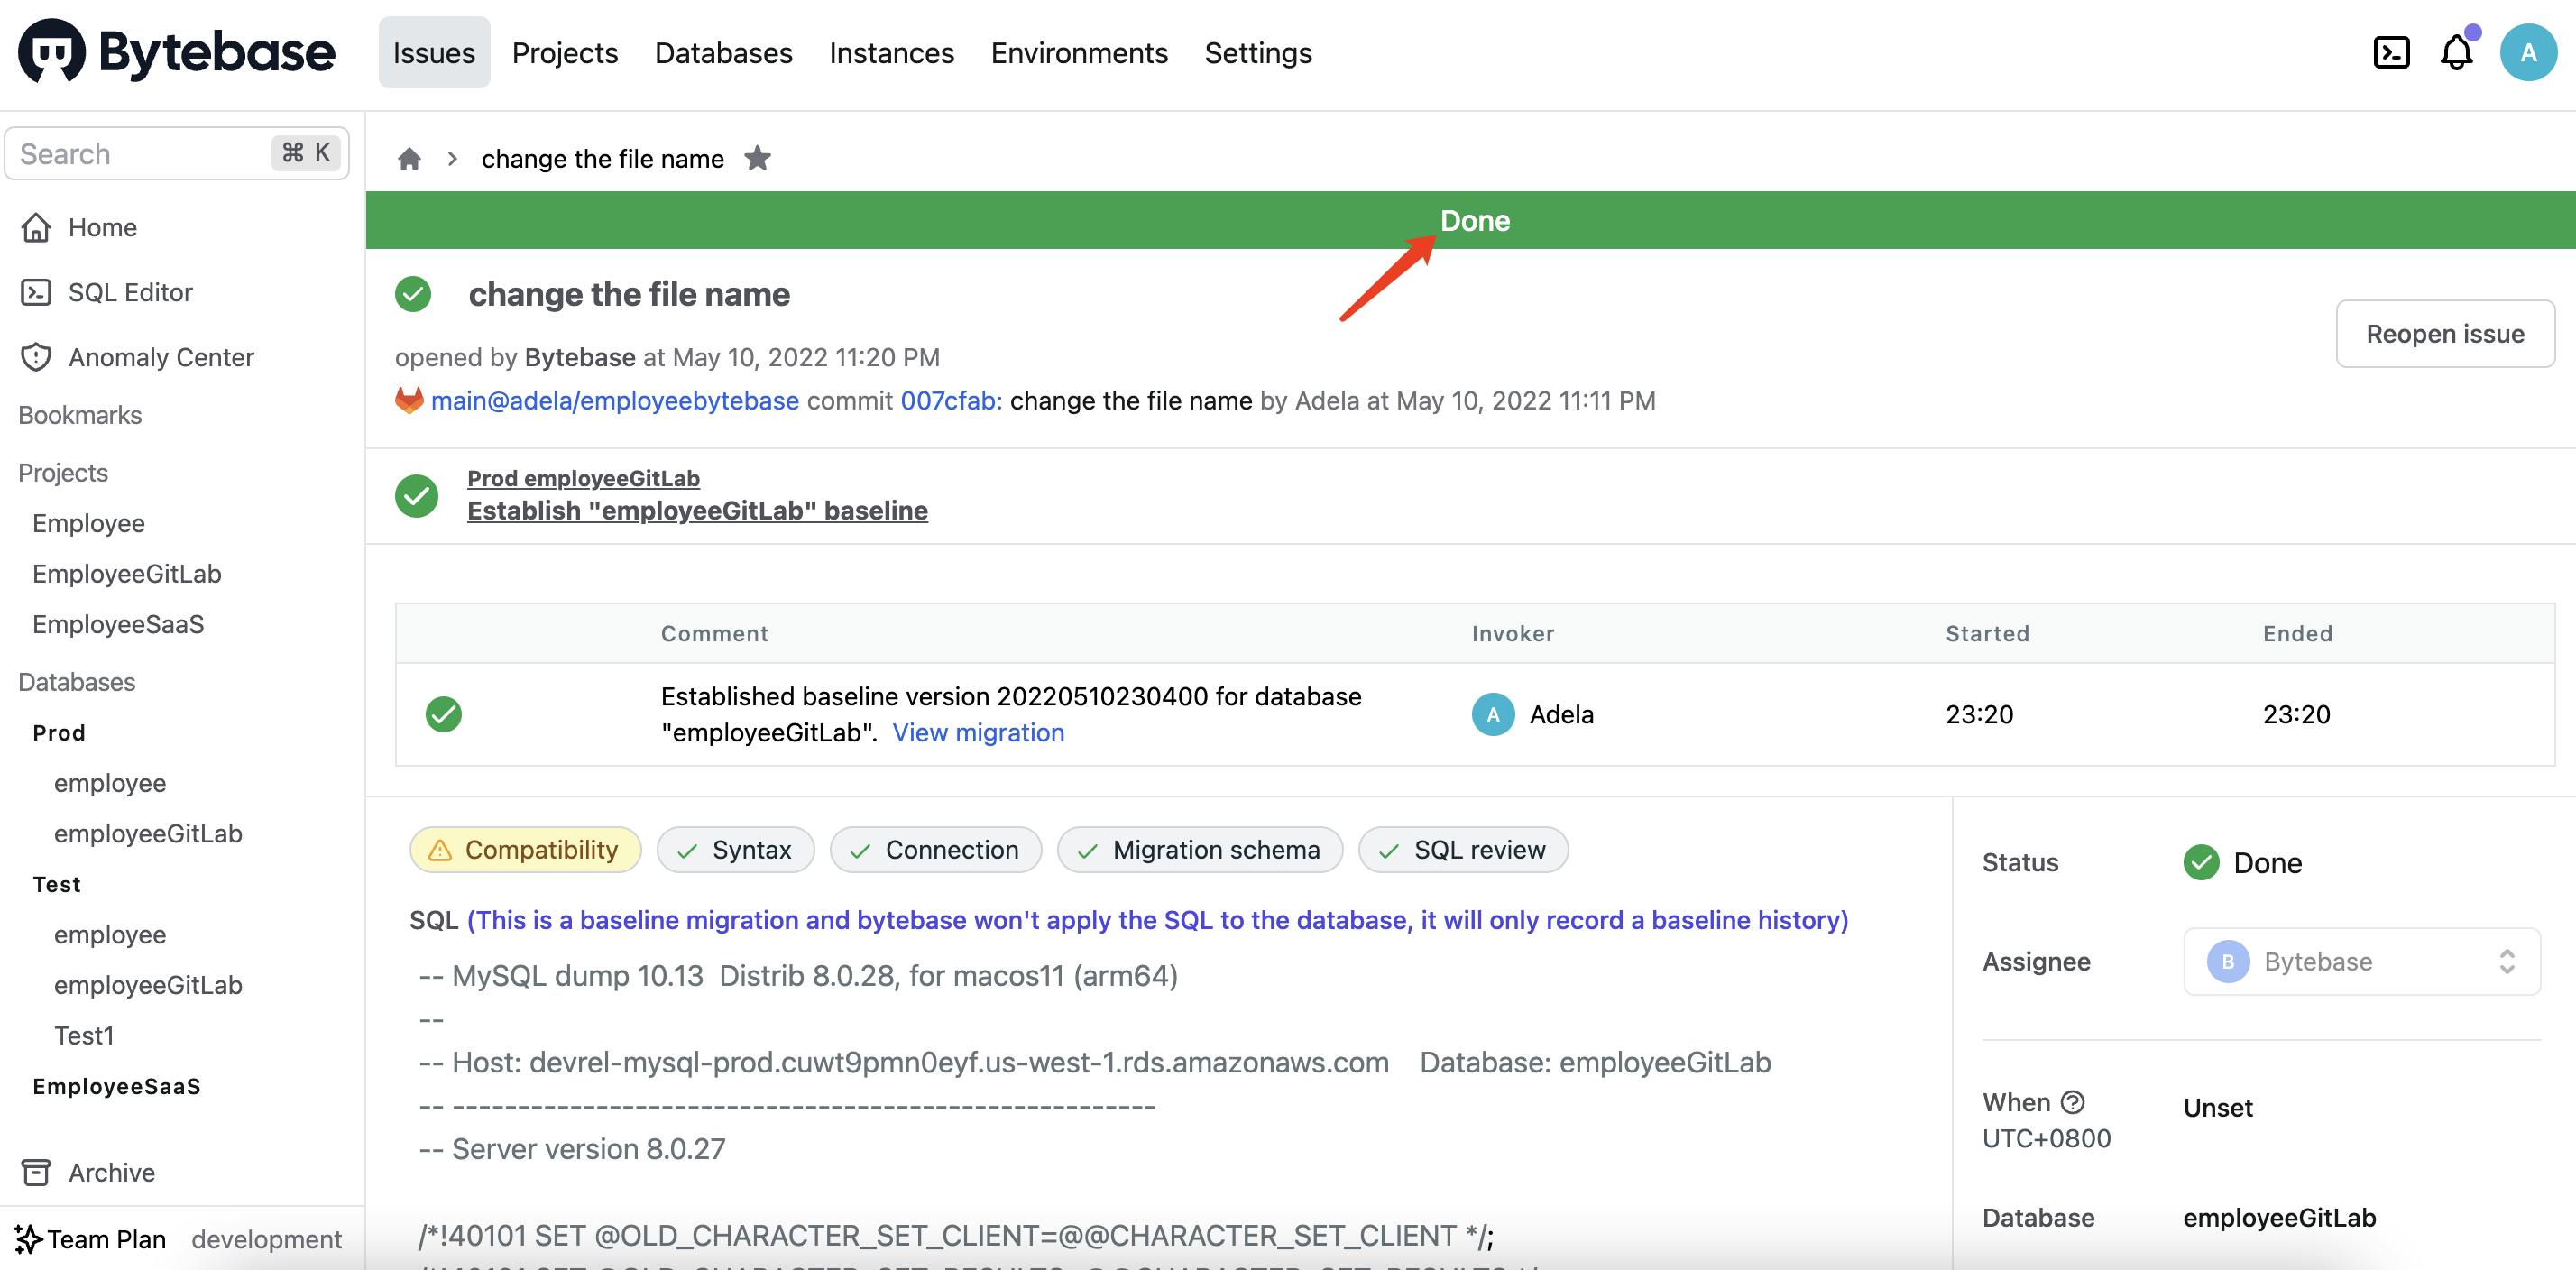
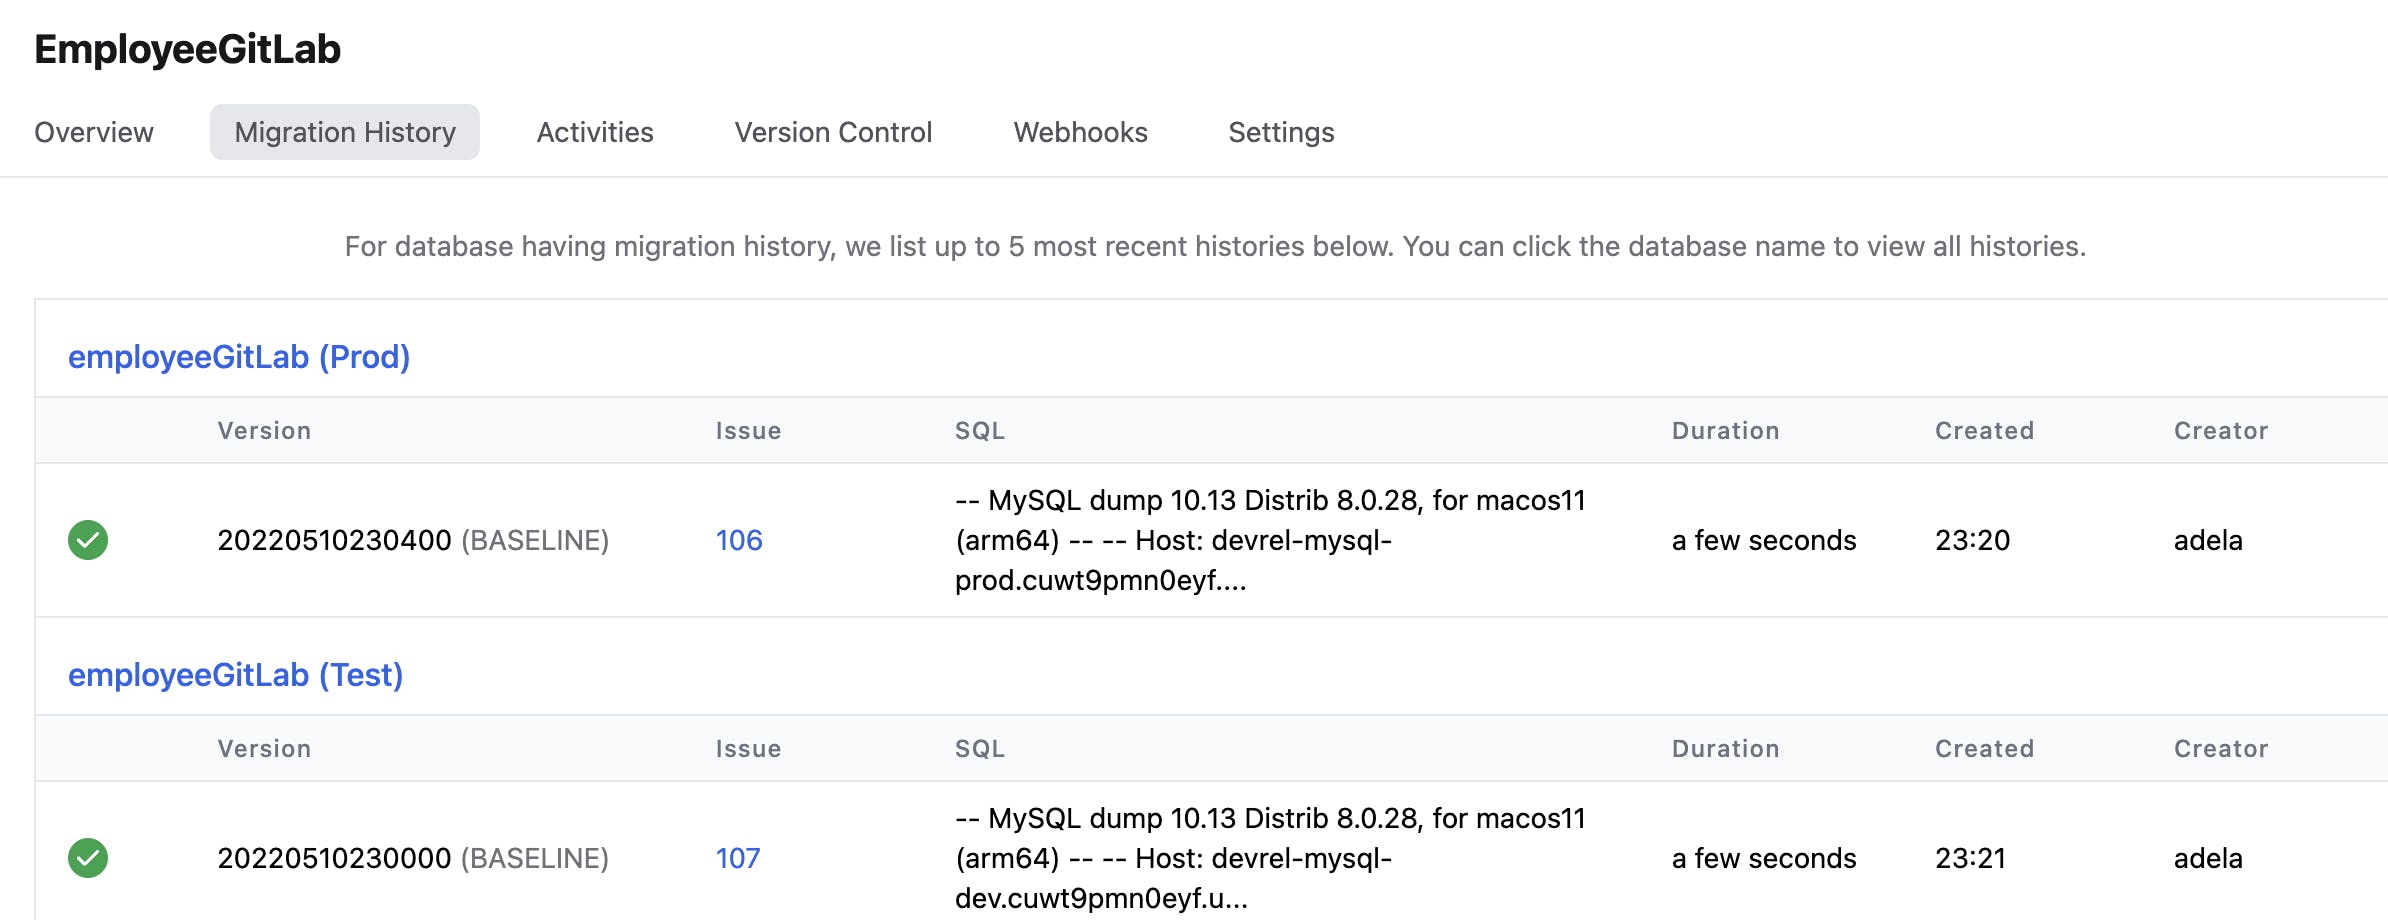
- If we go to the project Migration History tab, we can view all the migration history.
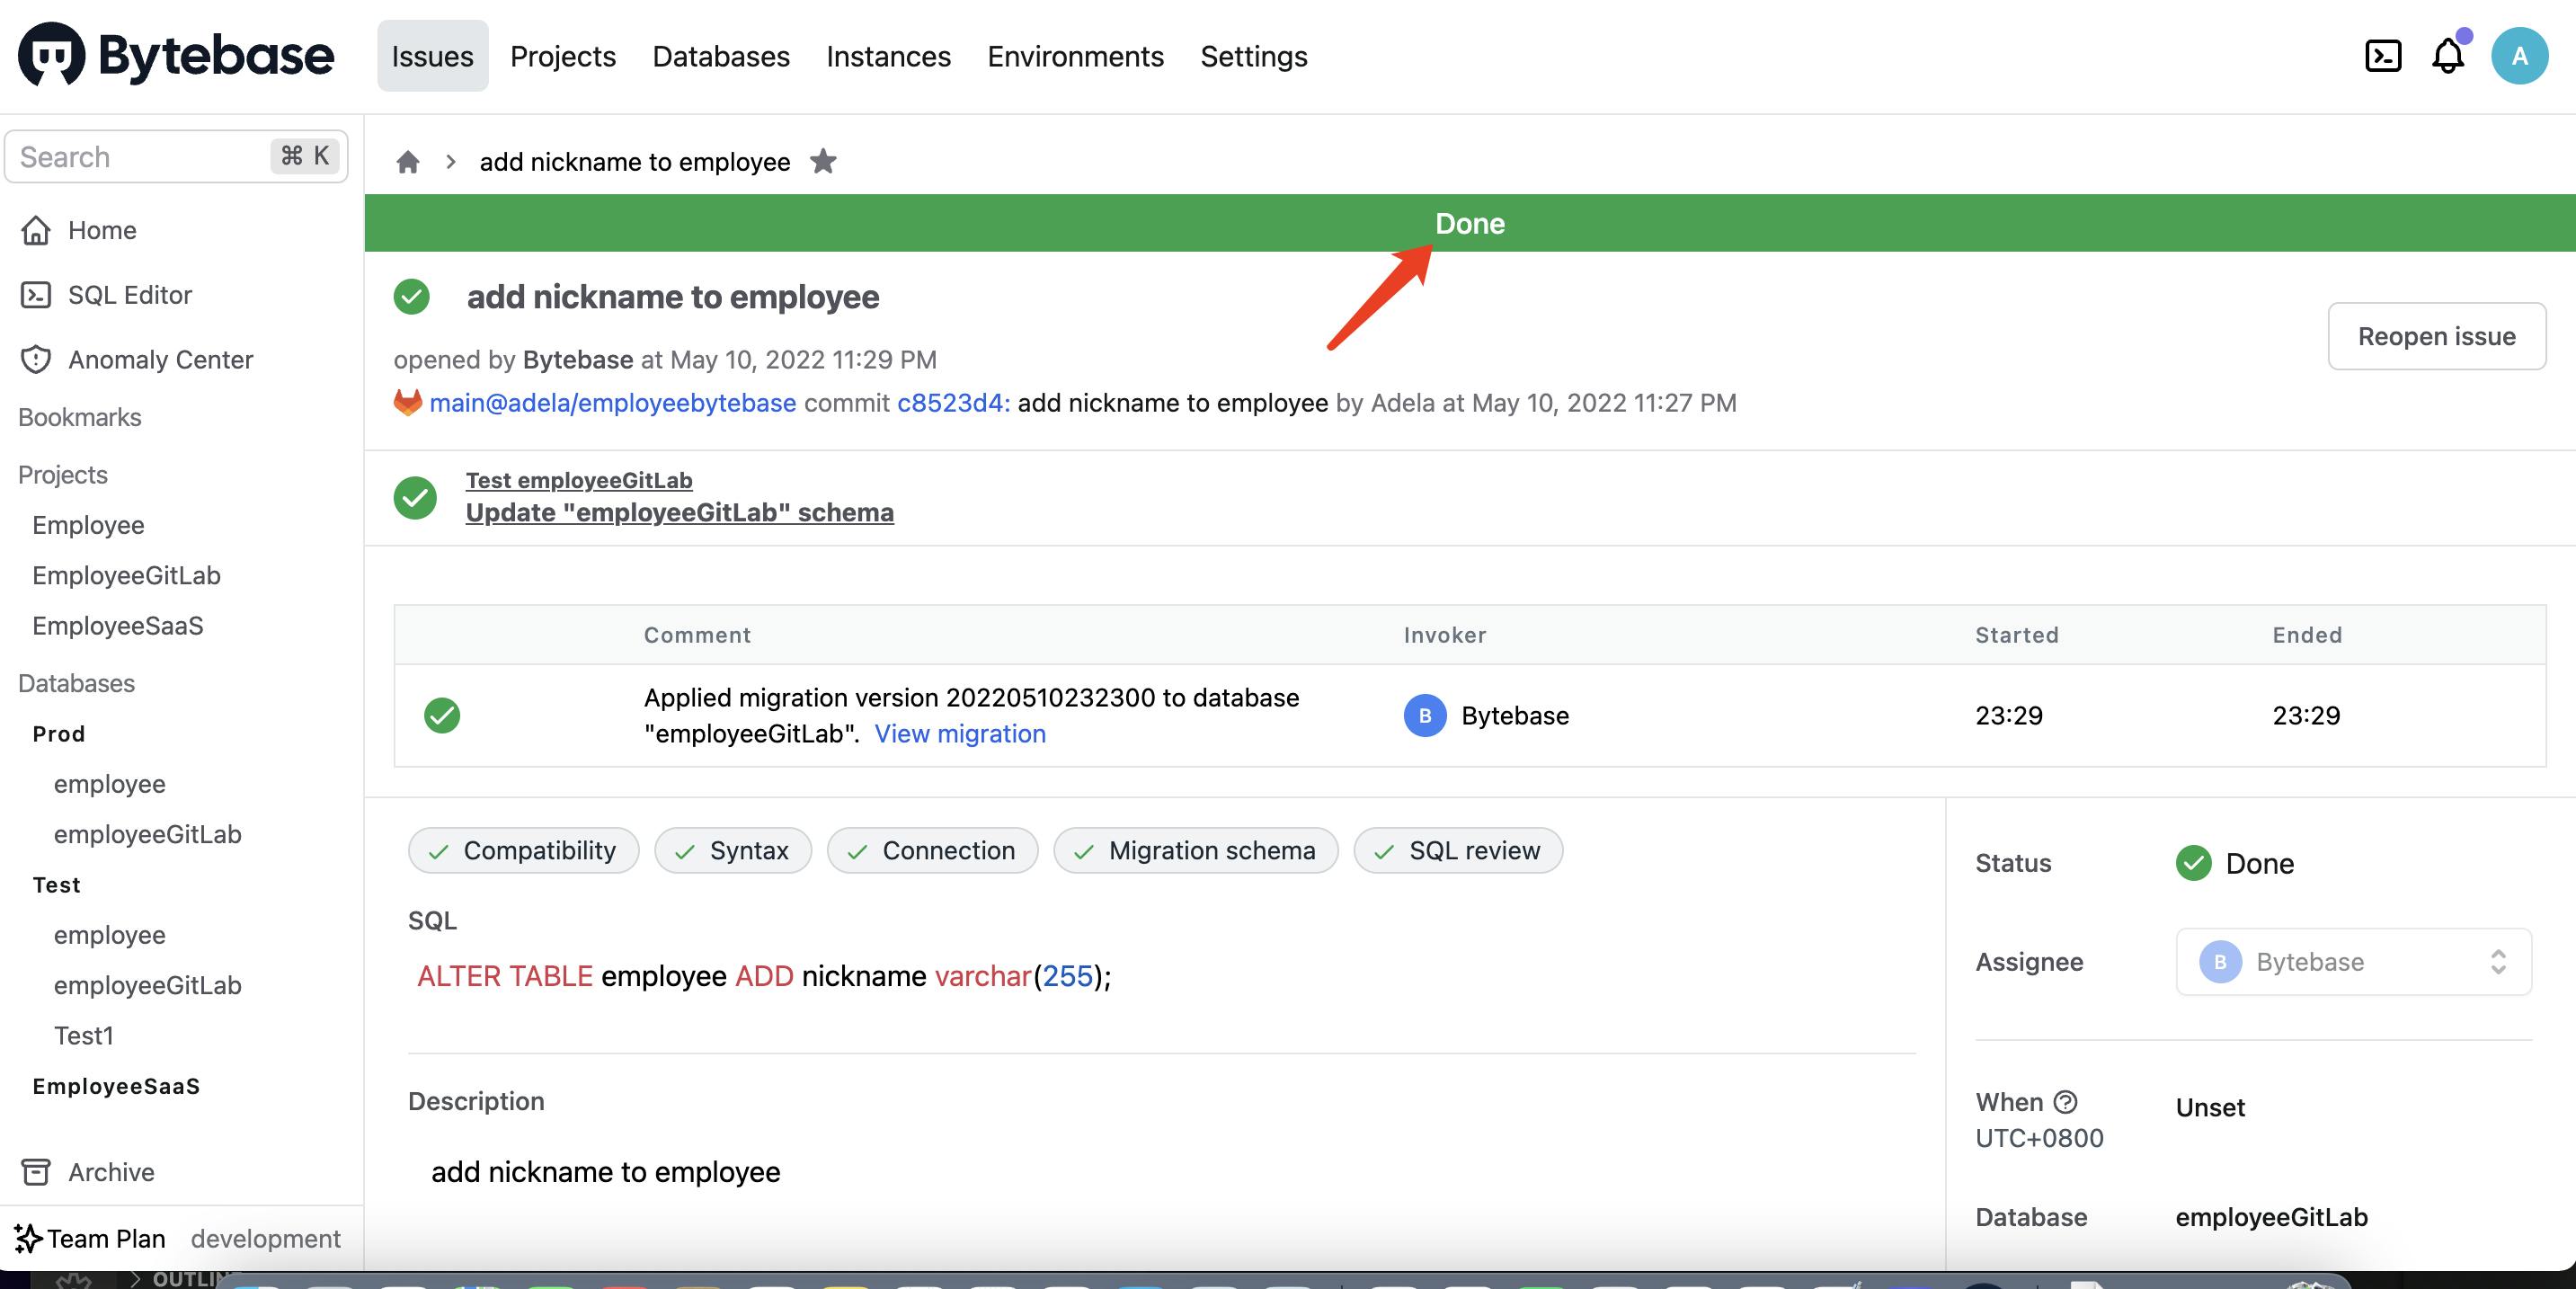
Step 5 Create the First Normal Migration
- After setting the baseline, now it's the real schema change. Our first task is to add nickname column to employee. It's similar to Step 4, except the file names should use migrate instead of baseline. Let's first try on Test.


- Repeat the process on Prod and approve manually.